• Skip to secondary menu
  • Skip to main content
  • Skip to primary sidebar
  • Skip to footer
  • Home
  • About
    • Email Me
    • Disclosure & Copyright
  • Start Here
  • Subscribe
  • Privacy Policy
  • Books for Moms

Creative Family Fun

Your one-stop shop for kids activities and family fun

  • Facebook
  • Instagram
  • Pinterest
  • Twitter
  • Spelling Activities
  • Family Fun
  • STEM
  • Movie Night
  • Toddler Activities

STEAM Activities

Math Art: Skip Counting Pointillism

June 19, 2017 By Terri Thompson

I’m very fascinated with the combination of math and art. There are some truly amazing things you can do. And honestly, the ideas are endless.

This time we kept it simple with a math art project that combined pointillism and skip counting. It was simple and the results were fun.

Add some creativity to your math practice with this fun math art project for kids. Learn about pointillism and do practice skip counting at the same time.

Disclosure: This post contains Amazon Affiliate and other Affiliate links. Please see my Disclosure Page for more details.

What is pointillism?

Before we begin, we need to understand our art term, pointillism. To create pointillism, a painter uses small, distinct dots in varying colors applied in a pattern to form an image.

One of the most famous paintings that uses this technique is A Sunday on La Grande Jatte by Georges Seurat. You can see it here.

So, for the art portion of our project, we’ll be using dots to create our pictures.

What is skip counting?

Skip counting is basically counting by any number other than one. You can count by 2s: 2, 4, 6, 8, 10. Or, you can count by 5s: 5, 10, 15, 20, 25.

You can find a detailed explanation of skip counting here at Creative Family Fun.

We’ll be counting by 10s for this project.

Add some creativity to your math practice with this fun math art project for kids. Learn about pointillism and do practice skip counting at the same time.

Now let’s combine pointillism and skip counting for a fun math art project.

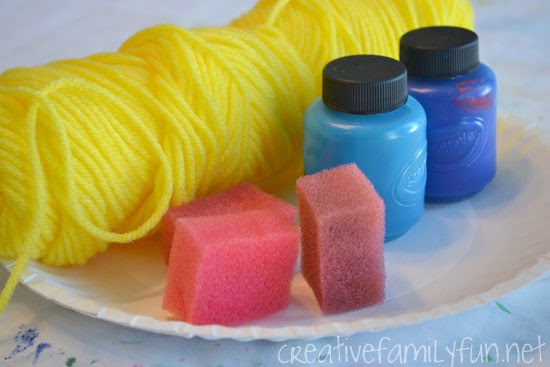
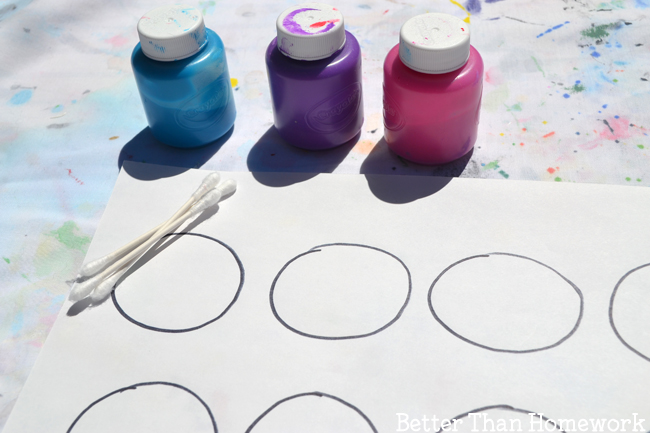
First, you’ll need a few supplies: paint, cotton swabs, marker, and paper.

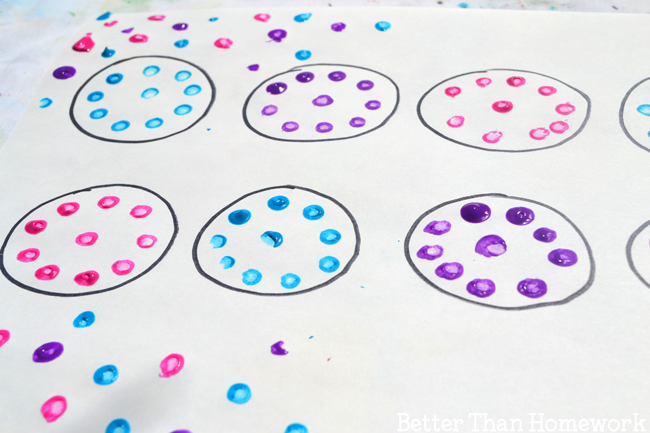
Next, you’ll need to lay your foundation. We were skip counting by 10 all the way to 100 so I drew ten simple circles on my paper for each of my set of dots.

Don’t limit yourself to circles. You can do triangles, squares, ovals, or any fun design of your choice. You just need one shape for each set of ten.

Add some creativity to your math practice with this fun math art project for kids. Learn about pointillism and do practice skip counting at the same time.

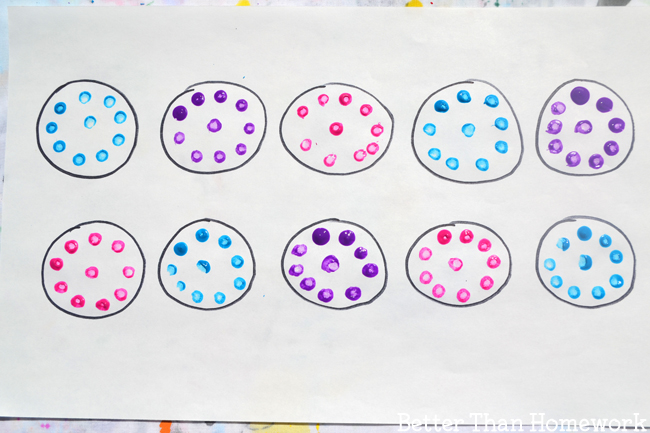
Once you’ve got your foundation, it’s time to paint. Dip your cotton swabs in paint and use them to create a design of dots in each circle. Put ten dots inside each circle.

Use a simple design or just random dots. The important part of the project is to make sure you only have 10 dots in each shape.

Add some creativity to your math practice with this fun math art project for kids. Learn about pointillism and do practice skip counting at the same time.

Now it’s time to skip count!

Once you have your dots in each circles, you’ve got a pretty representation of skip counting by ten.

Count your circles: 10, 20, 30, 40, 50, 60, 70, 80, 90, 100. You’ve got one hundred dots total on your skip counting math art project!

When you’re done, feel free to be creative and add even more dots to make an art project you’re proud of. Our skip counting is inside our shapes and the embellishment is just for fun.

Add some creativity to your math practice with this fun math art project for kids. Learn about pointillism and do practice skip counting at the same time.

More versions of this math art project:

Paint a picture for each set of skip counting numbers. What shapes will you use when you’re counting by twos? What shapes for counting by fives? Can you make a unique painting for each skip counting set?

Can you create skip counting sets without drawing the foundation shapes? Use just your dots to create ten different design sets.

Use this project to illustrate a multiplication problem. Do a math pointillism project for 5×5, 6×9, or 8×4. Fun, right?

How else can you do math pointillism?

How would you mix this project up?

Add some creativity to your math practice with this fun math art project for kids. Learn about pointillism and do practice skip counting at the same time.

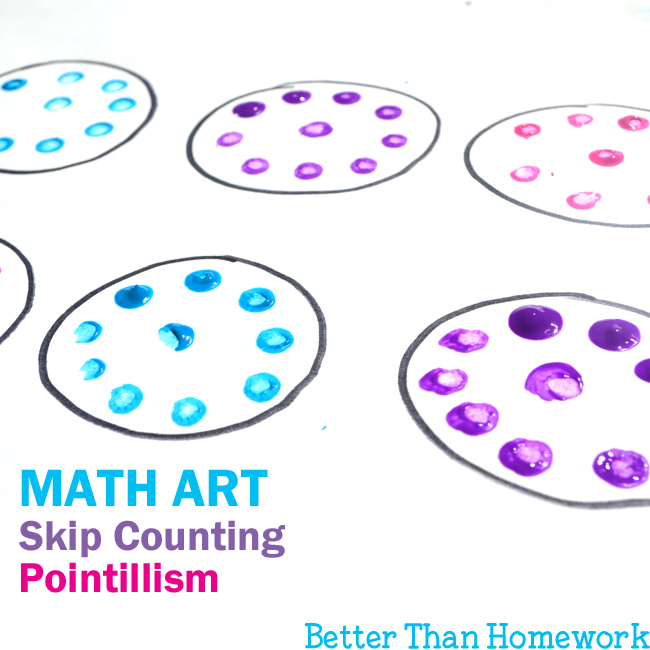
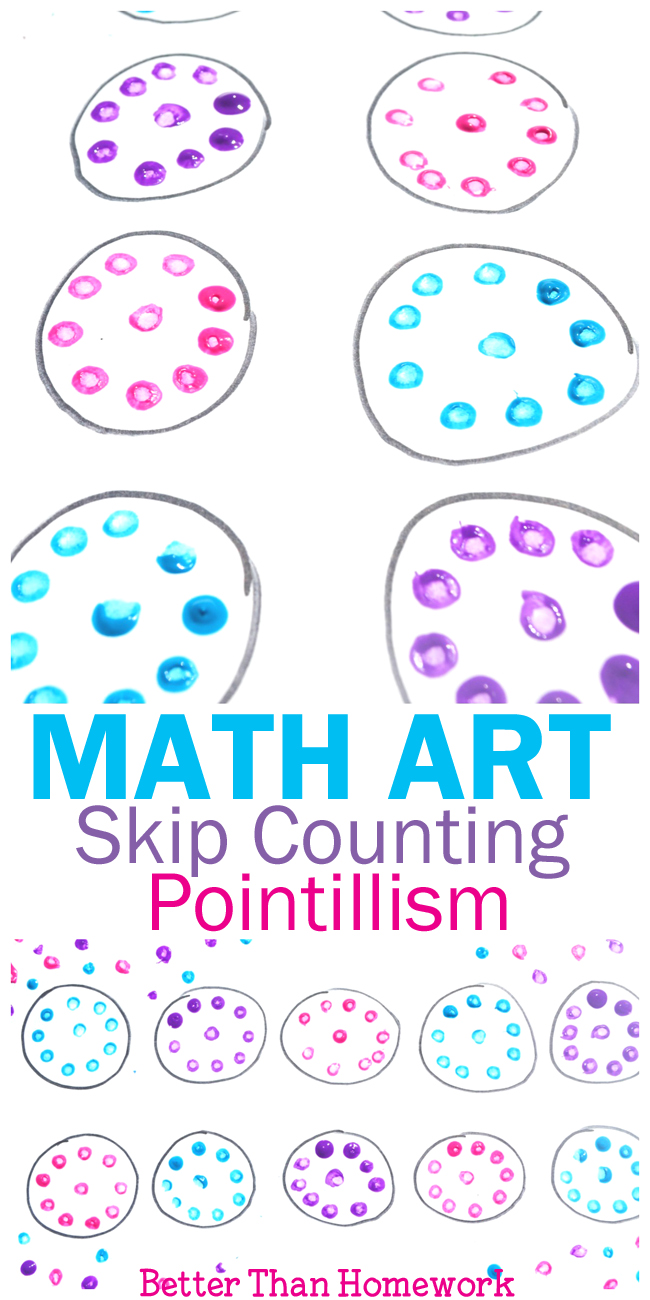
If you enjoyed this math art project, the above picture is perfect for sharing on Facebook, or you can share the picture below on Pinterest.

Add some creativity to your math practice with this fun math art project for kids. Learn about pointillism and do practice skip counting at the same time.

You may also like one of these math activities:

Fine Motor Skip Counting Activity

Making Ten With Cars

Skip Counting by Tens with Bottle Caps at Creative Family Fun

Potato Printing Tesselations at Rainy Day Mum


Sun and Rain Sensory Bottles

June 14, 2017 By Terri Thompson

I’ve long admired sensory bottles and have been wanting to make a few of my own.

There are so many incredible versions, but this time, I opted for a simple glittery bottle.

We used sunshine and rain as our inspirations to make these gorgeous Sun and Rain Sensory Bottles.

Making sensory bottles is always fun, especially when you're inspired by the weather. These sun and rain sensory bottles are simple and fun to make.

*Disclosure: CraftProjectIdeas.com provided some of the supplies used in this project. This  post also contains Amazon Affiliate and other links. Please see my Disclosure Page for more details.

Supplies Needed

Empty plastic bottles (We used these.)
Water
Food Coloring
Glitter
Tri-beads
Super glue (adult use only!)

Making sensory bottles is always fun, especially when you're inspired by the weather. These sun and rain sensory bottles are simple and fun to make.

How to make your sun and rain sensory bottles

To make your bottles, fill an empty bottle with water. Leave some space at the top for your add-ins.

Next, add 5 to 6 drops of food coloring. My 4-year-old was in charge of the food coloring, so we ended up with more a lot more drops.

Now it’s time to add the glitter. We have an abundant supply of glitter, so we added quite a bit. The more glitter the better, I say!

Making sensory bottles is always fun, especially when you're inspired by the weather. These sun and rain sensory bottles are simple and fun to make.

Next, add your tri-beads. We picked out orange and yellow beads for our sunshine bottle and blue and clear beads for our rain bottle.

Previously, we experimented with a few different items until we hit on something that would work in our bottles. We tried foam shapes, but they only float to the top and we couldn’t get them to mix in with the water and glitter. After a lot of experimenting, we discovered that items that sink mix together nicely when you’re shaking the bottle.

Once you have everything in your bottle, add a little more water to fill your bottle to the top.

Finally, super glue the cap onto the bottle. Now you won’t have to worry about it opening and spilling water and glitter all over your floor!

Making sensory bottles is always fun, especially when you're inspired by the weather. These sun and rain sensory bottles are simple and fun to make.

(Here’s a little behind the scene picture for you! My daughter was taking her own pics right beside me. We found ourselves racing against time to catch all the glitter before it settled!)

Making sensory bottles is always fun, especially when you're inspired by the weather. These sun and rain sensory bottles are simple and fun to make.

I just love the final result of these sun and rain sensory bottles. My 6-year-old can sit and watch them for a long time while rolling them around and around.

They’re quite beautiful!

Making sensory bottles is always fun, especially when you're inspired by the weather. These sun and rain sensory bottles are simple and fun to make.

Make this a family adventure!

This is a perfect craft to do together as a family.
Cost: Under $10. It all depends on what supplies you already have on hand.
Prep time: Under 10 minutes + a trip to the store for supplies, if needed.
Ages: 4 and up. Certain steps will need adult supervision.
Time needed: 20 minutes (plus drying time for the super glue)

More Great Sensory Bottle Ideas

Babbling Brook sensory bottle from House of Burke.
Spring flower sensory bottle from My Little 3 and Me.
Making waves sensory bottle from Hands On: As We Grow.
Magnetic sensory bottle from Munchkin and Bean.

Making sensory bottles is always fun, especially when you're inspired by the weather. These sun and rain sensory bottles are simple and fun to make.

You make also like one of these fun ideas:

Colored Ice Fun

Raindrop Mobiles

10 Ways to Learn About the Weather

Color Mixing Lab STEAM Activity

May 24, 2017 By Terri Thompson

What do you get when you combine science and art into a fun STEAM project?

A color mixing lab!

We continued our study of color by performing some experiments to find out what happens when you mix color.

Combine art and science into a fun STEAM project where you can learn about color mixing. This color mixing lab is a fun hands-on sensory activity.

Disclosure: This post contains Amazon Affiliate and other affiliate links. Please see my Disclosure Page for more details.

Set up your color mixing lab

We used two basic forms of color: colored water and colored ice cubes.

I prepped the ice a few hours earlier by adding a couple of drops of food coloring to the water in an ice cube tray. I only made the primary colors: red, yellow, and blue.

When it was time to experiment, I also made three cups of primary colored water using food coloring again.

Combine art and science into a fun STEAM project where you can learn about color mixing. This color mixing lab is a fun hands-on sensory activity.

I set up the lab with the ice cubes, water, and a pile of white coffee filters.

I showed the girls how they could dip the filters into the water to dye them.

Combine art and science into a fun STEAM project where you can learn about color mixing. This color mixing lab is a fun hands-on sensory activity.

Experiment with color

The experiments began in earnest.

We’d dip in blue and then use a yellow ice cube to color over it. Suddenly we had green!

We tried red and blue and got purple.

It wasn’t long before we had a pile of colorful coffee filters and a couple of girls wondering what would happen if they dipped a coffee filter in all of the colors? The result, a “beautiful” brown coffee filter!

Combine art and science into a fun STEAM project where you can learn about color mixing. This color mixing lab is a fun hands-on sensory activity.

When we ran out of coffee filters, we took our experiments one step further. It was time to mix the water and the ice cubes.

We dropped the yellow cubes into the blue water and watched as the water quickly turned from blue to green. Drop, drop, drop, and suddenly our primary colors turned into secondary colors.

So much fun!

Combine art and science into a fun STEAM project where you can learn about color mixing. This color mixing lab is a fun hands-on sensory activity.

Experimenting with color is a fun and vibrant way to mix a little art and science together.

Set up your own color mixing lab; it’s fun for preschoolers and school-aged kids!

What is your favorite way to experiment with color?

Combine art and science into a fun STEAM project where you can learn about color mixing. This color mixing lab is a fun hands-on sensory activity.

More colorful activities you may enjoy:

Rainbow Writing

Rainbow Color Hunt

Color Wheel Painting

Indoor Color Scavenger Hunt

Phases of the Moon Mobile

May 15, 2017 By Terri Thompson

I’ve always found that the moon is the perfect introduction to the night sky for kids. It’s easy to observe; you don’t need any special equipment to see it. Plus, there are so many kid-friendly resources to help you learn about it.

Today’s project is all about the phases of the moon. We took a little learning and turned it into a kids craft project so you can have the moon in your room both day and night.

This phases of the moon mobile is easy and takes only a few supplies, which you may already at home.

Combine science and art to make this simple phases of the moon mobile out of paper plates. It's a fun way to learn about the moon.

Disclaimer: This post contains Amazon Affiliate links. Please see my Disclosure Page for more details.

Learn about the phases of the moon

Every night the moon looks different. Over the course of a lunar month (approximately 30 days) the moon goes through several phases, from new, to crescent, to quarter, to gibbous, to full. It changes because the moon rotates around the earth.

You can get a detailed but kid-friendly explanation here from NASA.

To get excited about the moon and to do a little hands-on learning, we’re going to create a simple illustration of the moon phases.

Combine science and art to make this simple phases of the moon mobile out of paper plates. It's a fun way to learn about the moon.

Supplies Needed

2 paper plates
Scissors
Multiple colors of blue paint
Sponge
Hole punch
Yarn
Coat hanger

Combine science and art to make this simple phases of the moon mobile out of paper plates. It's a fun way to learn about the moon.

How to make a Phases of the Moon Mobile

For this moon mobile, we made three moon phases. We made a full moon, a quarter moon, and a crescent moon. You can make as many phases as you would like.

For the full moon, leave one paper plate whole. Cut the other paper plate in half. Use one of the halves for your quarter moon and cut the other half in the shape of a crescent moon.

Combine science and art to make this simple phases of the moon mobile out of paper plates. It's a fun way to learn about the moon.

Using your blue paints, sponge paint your three different moons. We only had two different shades of blue so that’s what we used. Use as many shades of blue as you would like, or add in grey and white for a different color scheme. If you only have one shade of blue, use white paint to lighten some of it.

I cut up a sponge into small squares to use for painting. The small squares of sponge are perfect for little hands to use.

Combine science and art to make this simple phases of the moon mobile out of paper plates. It's a fun way to learn about the moon.

After your moons have dried, punch a hole in the top of each. Tie a piece of yarn through your hole and again to your coat hanger.

I varied the length of my yarn so our moon phases would hang at different levels.

Once you’re done, hang your phases of the moon mobile up in your room and wow everyone with your new knowledge of the moon.

Combine science and art to make this simple phases of the moon mobile out of paper plates. It's a fun way to learn about the moon.

To learn more about the phases of the moon

Watch this beautiful video on YouTube. Set to the soundtrack of Beethoven’s Sonata No 14, an animated moon works its ways through all of its phases.

Stop by Kids Activities Blog for another fun project you and your kids can do to chart the moon and learn about the different phases.

MoonConnection.com has a moon phase calendar you can use for reference. You can switch between the northern hemisphere and the southern hemisphere to get the correct moon calendar for your location.

Learn about the night sky with one of these fun ideas:

Tips for Observing the Night Sky with Kids

Fun Night Sky Activities for Kids

Simple Sewing – Constellation Wall Hanging

Puffy Paint Moon at Rainy Day Mum

The Power of Wind: A Lesson in Wind Energy

December 22, 2014 By Terri Thompson

About 20 miles from our home is a wind farm. It’s a hard working wind farm, which makes sense, because, wind is just a part of life in my hometown. We’re much more likely to experience a brisk wind than a light breeze. Because of that, wind farms are quite common.

I never fully understood wind energy before I saw it with my own eyes and felt it on my own skin. It’s hard to imagine how a simple breeze can power a whole house, but with a few simple experiments, you can teach your kids all about this form of alternative energy.

Disclosure: This is a sponsored conversation written by me on behalf of Xcel Energy. The opinions and text are all mine.

Discover wind energy and find out how it is a green (and wonderful) form of alternative energy with this kid-friendly explanation.
Photo via Stephen Jones, Creative Commons license

Discovering Wind Energy

It’s so simple to experiment with wind power! Do you have a simple pinwheel toy? Hold it up the the wind and watch it go. If you don’t have any wind, hold it up in front of a fan. This very simple toy can show your child just how a wind turbine works. The toy spins around just like the large blades of a turbine.

Discover wind energy and find out how it is a green (and wonderful) form of alternative energy with this kid-friendly explanation.

Now that you’ve seen how the turbine spins, it’s time to discover the power of wind. Craft a simple paper airplane. Throw it in the same direction the wind is blowing. Can you see how far it goes? Now, throw it in the opposite direction. What happens to the airplane? Can you see the wind at work?

Do you want to see the power of wind on a larger scale? If you live near a wind farm, drive by and watch the turbines work for awhile. If you don’t live near a wind farm or you want to see even more, you can take a virtual tour of a wind farm at this link.

Discover wind energy and find out how it is a green (and wonderful) form of alternative energy with this kid-friendly explanation.
Photo via Stephen Jones, Creative Commons license

Xcel Energy is doing amazing things with wind energy. Check out this infographic to see the amazing things they’re doing in Minnesota alone. Amazing. Wind is clean, green, and renewable. And, if you live in Colorado, Minnesota, Michigan, Wisconsin, or New Mexico, you can enroll in WindSource through Xcel Energy.

WindSource is a voluntary green power program which gives customers the choice to support renewable energy. It gives you, the customer, the chance to choose how you want to use energy. You can put that wind power to good use.

You can find out more information and sign up through this link: Xcel Energy – WindSource. Isn’t it amazing that you can use wind power in your home and in turn support a greener and cleaner source of power.

You may also like one of these activities:

Sink or Float? Science Project

Marshmallow Engineering STEAM Building Challenge

Melting Crayons Science Activity

Hot Chocolate Science

  • « Go to Previous Page
  • Page 1
  • Interim pages omitted …
  • Page 3
  • Page 4
  • Page 5
  • Page 6
  • Page 7
  • Go to Next Page »

Primary Sidebar

Footer

Categories

Archives

Copyright © 2025 · Designed by The Blog Surgery

Creative Family Fun uses cookies to improve your experience. These cookies provide feedback to our analytics and advertisers. We use the information to track views of the site, where you go and to know if you are a regular visitor or brand new as well as provide a personalized experience where possible. We'll assume you're ok with this, but you can opt-out if you wish.Accept Reject Read More
Privacy & Cookies Policy

Privacy Overview

This website uses cookies to improve your experience while you navigate through the website. Out of these, the cookies that are categorized as necessary are stored on your browser as they are essential for the working of basic functionalities of the website. We also use third-party cookies that help us analyze and understand how you use this website. These cookies will be stored in your browser only with your consent. You also have the option to opt-out of these cookies. But opting out of some of these cookies may affect your browsing experience.
Necessary
Always Enabled
Necessary cookies are absolutely essential for the website to function properly. This category only includes cookies that ensures basic functionalities and security features of the website. These cookies do not store any personal information.
Non-necessary
Any cookies that may not be particularly necessary for the website to function and is used specifically to collect user personal data via analytics, ads, other embedded contents are termed as non-necessary cookies. It is mandatory to procure user consent prior to running these cookies on your website.
SAVE & ACCEPT