• Skip to secondary menu
  • Skip to main content
  • Skip to primary sidebar
  • Skip to footer
  • Home
  • About
    • Email Me
    • Disclosure & Copyright
  • Start Here
  • Subscribe
  • Privacy Policy
  • Books for Moms

Creative Family Fun

Your one-stop shop for kids activities and family fun

  • Facebook
  • Instagram
  • Pinterest
  • Twitter
  • Spelling Activities
  • Family Fun
  • STEM
  • Movie Night
  • Toddler Activities

Art Activities

Monochromatic Collage Valentine’s Day Art

January 2, 2018 By Terri Thompson

I love art. I love doing it, I love seeing it, and I love thinking about it.

And, that’s how this monochromatic collage project came about.

It all started when I was browsing Pinterest and stumbled across this blog post for cardboard self-portraits.

My mind started thinking two things: first, what an amazing project it was, and second, what else could we do with a similar method.

After mulling it over in my head a few days, I latched on to the idea of a monochromatic collage.

So, the other day after school, my girls came home to a table full of supplies and we had some fun creating a Monochromatic Collage Valentine’s Day Art Project.

Use recycled materials to make a fun Monochromatic Collage Valentine's Day art project. Make art using texture to create a stunning single color project. #ValentinesDay #kidsart #CreativeFamilyFun

Disclosure: This post contains Amazon Affiliate and other affiliate links. Please see my Disclosure Page for more details.

Use recycled materials to make a fun Monochromatic Collage Valentine's Day art project. Make art using texture to create a stunning single color project.

How to set up your art project

I looked through my craft supplies and pulled a variety of things that would provide texture and also would be able to be painted.

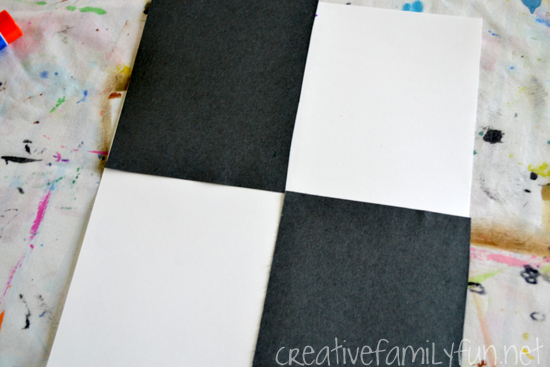
I found squares of heavy cardboard (cut from a packing box) to use for our canvas.

And, I tore out the middle of corrugated cardboard, so we could use the rippled part.

I also found craft sticks and a pile of craft foam that hadn’t seen the light of day in a good long while.

I grabbed glue, scissors, paint brushes, and pink and red paint, and spread them out on the table.

Now all that I needed were the artists.

Use recycled materials to make a fun Monochromatic Collage Valentine's Day art project. Make art using texture to create a stunning single color project.

Make your Monochromatic Collage

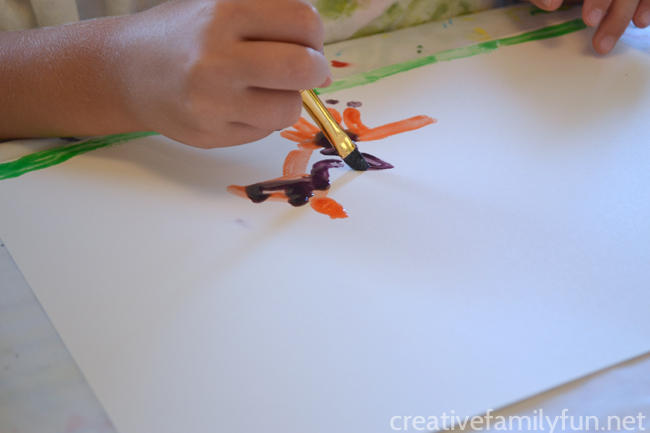
Once the girls got home from school, they immediately started examining the art table. (They love to have a project waiting for them when they get home.)

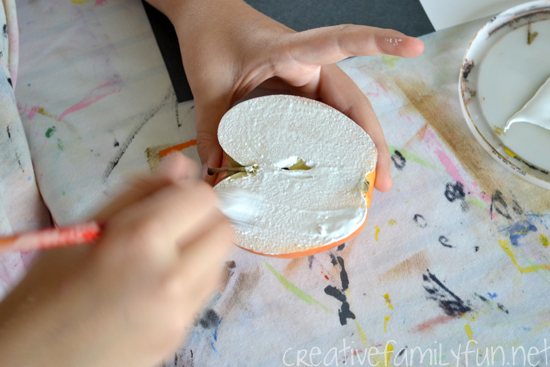
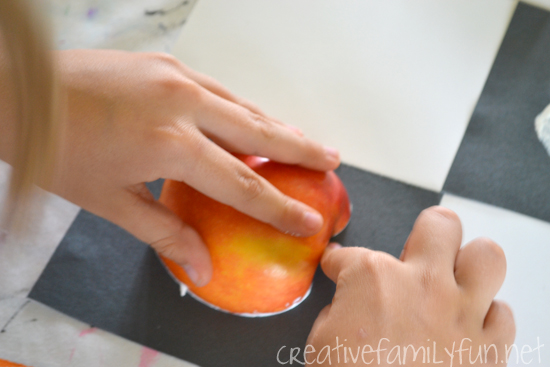
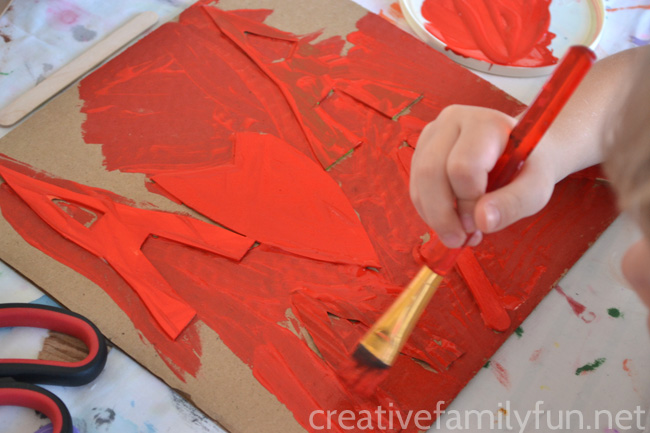
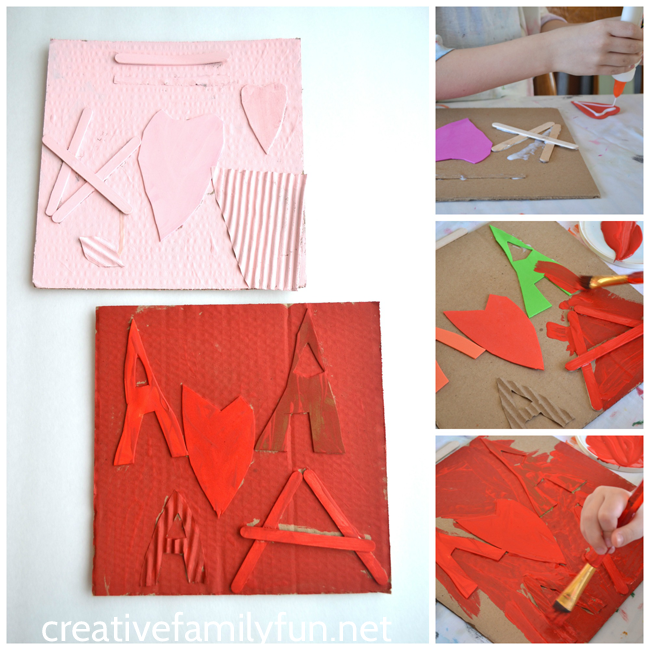
I explained the concept: create a collage on your cardboard using the items I had out. Once the glue dries, paint over the whole thing with your choice of paint color.

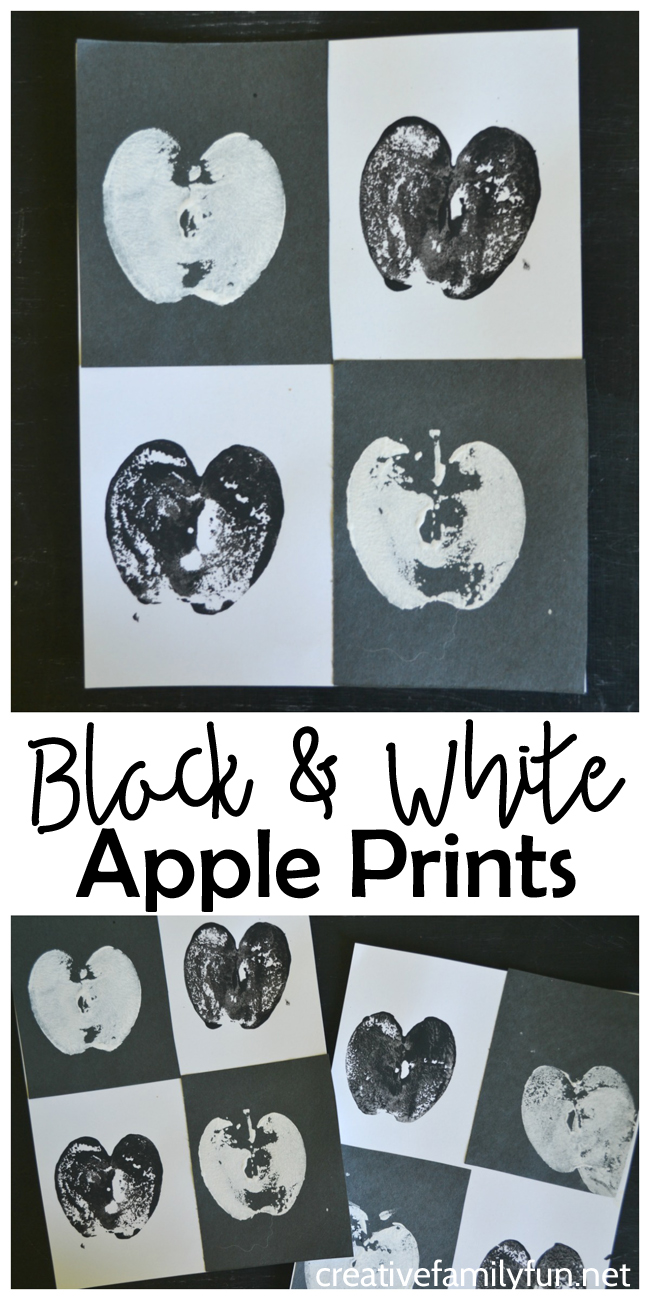
The results were amazing.

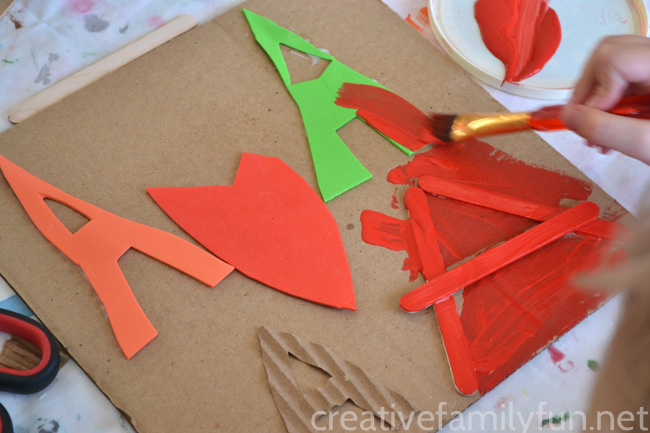
I had one daughter come up with a deliberate plan, the A’s, and set out to create it.

The other had a more organic process and just made it up as she went along.

Once the glue was dry enough to not smear all over our collages when we painted, the girls painted over their project with a single color.

Use recycled materials to make a fun Monochromatic Collage Valentine's Day art project. Make art using texture to create a stunning single color project.

This was such a fun and open-ended art project.

Don’t limit yourself to the supplies I listed, just grab what you have at home.

You only need to think about whether or not you can paint over the supplies you use. That’s it!

It’s time to go create a pretty Monochromatic Collage Valentine’s Day art project.

Use recycled materials to make a fun Monochromatic Collage Valentine's Day art project. Make art using texture to create a stunning single color project.

You may also like one of these Valentines Crafts:

Valentine Watercolor Resist Painting

Valentine Negative Space Art

Simple Valentine Card Making Station

Heart Garland Process Art at Little Worlds

Black and White Apple Prints: A Lesson in Contrast

August 14, 2017 By Terri Thompson

I just love making apple prints and every year we do some version of this quintessential fall project. Although my girls would be perfectly happy doing a traditional version of the project – apples prints with red or green paint – I wanted to do something a bit different this year.

I updated the project, added a little twist, and used it to illustrate an art concept – contrast.

Learn about the art concept of contrast when you create this fun twist on the traditional apple prints kids craft: Black and White Apple Prints.

Disclosure: This post contains Amazon Affiliate links. Please see my Disclosure Page for more details.

What is contrast?

Very simply, contrast is a difference. It’s often shown in by using opposite elements. It’s used to create visual interest and drama in a piece of art.

One of the best ways to show contrast is through the use of black and white. I knew it would be the perfect way to illustrate this concept to my daughters using apple prints.

Learn about the art concept of contrast when you create this fun twist on the traditional apple prints kids craft: Black and White Apple Prints.

Supplies Needed

White card stock
Black paper
Glue
Apple
Black craft paint
White craft paint
Paintbrushes

Create Your Black and White Apple Prints Project

To begin the project, we wanted to create a piece of black and white checked paper.

We used the white card stock for a base. We cut the black paper into squares the same size as 1/4 of your piece of card stock.

Encourage your kids to do a little work with fractions and measurement to complete this step.

Glue your black paper to your card stock in opposite corners. It should look like the picture above. We used a glue stick for this step so we wouldn’t have to stop and wait for the glue to dry.

Learn about the art concept of contrast when you create this fun twist on the traditional apple prints kids craft: Black and White Apple Prints.

Now it’s time for the apple stamping! Cut an apple in half from the top to the bottom. You’ll use one half for the white paint and one half for the black paint.

Instead of dipping our apples in paint, we brushed it on for a more even coat.

Make one stamp in each of the four squares. Use white paint on the black paper and black paint on the white card stock.

Learn about the art concept of contrast when you create this fun twist on the traditional apple prints kids craft: Black and White Apple Prints.

Black and white apple prints are a very simple project, but it perfectly illustrated our art concept. We created a cool twist on a traditional craft and learned all about contrast in the process.

I love how the final project turned out. I think I’m going to frame these!

Learn about the art concept of contrast when you create this fun twist on the traditional apple prints kids craft: Black and White Apple Prints.

The 2nd Grade Blogging Team has been hard at work creating fun activities about apples. Check out the rest of the ideas below.

How to use an apple to explain basic fractions from Crafty Kids at Home
Apple Array Practice for Second Grade from Look! We’re Learning!
Apples Graphing Activity from Sallie Borrink Learning
Free Number Order Printable Apples from Life Over C’s
Preserve an apple from getting brown from Planet Smarty Pants
Apple Descriptions {adjectives} from School Time Snippets
Nouns and Verbs – Apple Theme from 123 Homeschool 4 Me
Apple Toothpick Tower Challenge from Preschool Powol Packets

Learn about the art concept of contrast when you create this fun twist on the traditional apple prints kids craft: Black and White Apple Prints.

You may also be interested in one of these fun art projects:

Symmetry Butterfly with Warm and Cool Colors

Painting on Music: Exploring Austria Though Art

Chinese Character Printmaking Project

Matisse Craft for Kids: Cut Paper Suncatchers

July 24, 2017 By Terri Thompson

One of my favorite ways to learn about famous artists is to do a project in the style of that artist.

Recently, we learned a little bit about Henri Matisse. We looked at many examples of his work, especially the work he did in the final years of his life when he created with paper cut-outs. He called it “painting with scissors.” You can find examples here. We then set out to do a fun Matisse Craft.

This style of work is so much fun to do. We used tissue paper for our cut-outs to create these Matisse Inspired Suncatchers.

Use the cut paper technique to make beautiful suncatchers with this fun Matisse craft for kids. It will look beautiful on your windows!

Disclosure: This post contains Amazon Affiliate and other affiliate links. Please see my disclosure for more details.

Supplies Needed

Colored tissue paper
Clear Contact Paper
Scissors
Painter’s Tape

Use the cut paper technique to make beautiful suncatchers with this fun Matisse craft for kids. It will look beautiful on your windows!

Prep your Matisse craft

To prep for the project, cut a piece Contact Paper for each child. Ours were about the size of a legal-sized sheet of paper.

You can do any size of suncatcher you want.

Use the cut paper technique to make beautiful suncatchers with this fun Matisse craft for kids. It will look beautiful on your windows!

Create your cut paper suncatchers

After we looked some examples of Matisse’s paper cut-outs, we talked about ways we could make our projects similar.

The girls noticed that he used large shapes and a lot of curvy lines, so we got the scissors out and started cutting.

We cut a variety of shapes from all the colors of tissue paper we had. I had purchased one of those multi-colored tissue paper packs from the dollar store. There was such a great variety of bright colors.

Use the cut paper technique to make beautiful suncatchers with this fun Matisse craft for kids. It will look beautiful on your windows!

Once we had a pile of cut-outs, the girls started getting creative. We used the tissue pieces to create our pictures before sticking them to the Contact Paper. My girls arranged and rearranged until they knew what they wanted to create.

When we were ready to create our suncathers, we took the backing off of the piece of  Contact Paper and used painter’s tape to stick it to the table sticky side up.

We’ve made many, many suncatchers and I’ve found that it’s helpful to tape the Contact Paper to the table. That way it won’t move all over the place. If you use painter’s tape, you can remove it easily from the Contact Paper.

Once we were done, we removed the contact paper and stuck it directly on the window. The Contact Paper won’t leave any sticky residue on the window.

If you do want to preserve your suncatchers, you can stick another piece of Contact Paper directly over the first piece, sticky side to sticky side.

Our Matisse creations

In the picture below, the creation at the top is a crazy, dancing alien.

The one at the bottom is a sad, crying face.

I love how they both turned out! My girls were able to capture the spirit of Matisse in their own style. Perfect!

Use the cut paper technique to make beautiful suncatchers with this fun Matisse craft for kids. It will look beautiful on your windows!

If you liked our Matisse craft, be sure to check out all of the great Famous Artist ideas from the 2nd grade blogging team!

Piet Mondrian Suncatcher Art for Kids from School Time Snippets
Van Gogh Inspired Sunflower Art Projects from Preschool Powol Packets
Warhol Inspired Art for Kids from Still Playing School
Jackson Pollock Inspired Tote Bag Art from Sugar Aunts
Georges Seurat Inspired Science with Art from Life Over C’s
An Artist Study for Elementary School from Planet Smarty Pants
Kadinsky Inspired Concentric Circles Collage from In the Playroom

Beautiful Spring Art Projects for Kids

March 10, 2017 By Terri Thompson

What are some things that come to mind when you think of spring?

I think of singing birds and butterflies. Pretty pastel flowers. Deep, long rainstorms giving every living thing a satisfying drink of water. Rainbows that show up after the rain is done.

Ah spring. It’s one of my favorite times of year. And, it’s the perfect time of year for one of these colorful spring art projects.

Your kids will love making these beautiful and colorful spring art projects that feature butterflies, rainbows, and flowers.

All of these spring art ideas capture the spirit of spring, the colors, and the new beginnings.

They’ll all look beautiful on display and would give your walls a touch of spring.

Disclosure: There are Amazon Affiliate and other affiliate links in this article which means, at no additional cost to you, we could receive compensation for our recommendations. You can read our full disclosure policy on our Disclosure Page for more details.

Pretty spring flower art

Delight your sense of smell when you create with these Spring Scented Microwave Puffy Paints from Fun At Home With Kids.

Create beautiful flowers and other spring scenes with this Pasta Mosaic Art Project at Buggy and Buddy.

Grab some bubble wrap to make these beautiful Bubble Wrap Spring Blossom Trees from Arty Crafty Kids.

Rain and rainbow spring art projects

Spring brings thunderstorms and a rainy day would be a great excuse to make some Thunderstorm Art from Buggy and Buddy.

Celebrate the rainbow after the storm with some Rainbow Shaving Cream Marbled Art from Hello, Wonderful.

Turn scrap craft supplies into a beautiful Rainbow Mandela from Finding the Golden Gleam.

Colorful spring art for kids

Create beautiful rainbow collages with this fun Rainbow Scrape Painting Art Project from Hello, Wonderful.

Take advantage of a rainy day and use the rain to help you create some pretty Rainbow Rainy Day Art from Rhythms of Play.

Experiment with tape resist to make these Watercolor Rainbow Tape Resist Paintings from Nurture Store.

Bright and beautiful flower art

Turn watercolor splotches into a field of spring flowers with this Watercolor Flower Doodles project from Art is Basic.

Take flower pictures from magazines and turn them into beautiful Flower Art from Mom on the Move.

Use watercolor resist to make these simple Watercolor Flowers from SparklingBuds.

Bright and bold spring art ideas

Paint with flowers and get some beautiful results with this Flower Print + Scrape Painting Project from Playful Learning.

Turn paper plates into huge, gorgeous flowers with this Hyper Colorful Painted Paper Plate Flowers project from Pink Stripey Socks.

Paint a pretty flower background to display flower drawings with this Flowers on Watercolor Background at Buggy and Buddy.

Pretty butterfly spring art projects

Play with symmetry to make these pretty Butterfly Symmetry Art with Warm and Cool Colors.

Make a whole wall full of these Melted Crayon Butterflies from Art Bar.

Use watercolors and crayons to make these gorgeous Stained Glass Butterflies from Rainy Day Mum.

Which one of these beautiful spring art projects do you want to try?

You may also like one of these fun art & craft collections for kids:

Rain and Raindrop Crafts for Kids

The Ultimate List of Rainbow Crafts for Kids

12 of the Best Winter Art Projects for Kids

The Cutest Caterpillar Crafts for Kids 

My favorite art resources

It’s easy to plan a fun art project with your kids when you have some art supplies on hand. Here are some supplies that I recommend:

Do you want to do more activities with your kids?

Join our fun Facebook community, Creative Family Fun for Busy Families, for daily activities that are great for kids and families. We’ll chat, share, and have fun. It’s a safe and private place to share ideas for family and kids activities.

I’d love for you to join me! Just click the link below, request to join, and answer the questions (they’re easy, I promise). Come join the fun! Join the Creative Family Fun for Busy Families community here.

Painting With Sugar – Exploring Barbados Through Art

November 4, 2016 By Terri Thompson

Every time we get creative with Project: Around the World, I realize just how valuable it is.

We learn a little, ask questions, wonder, and expand our world.

And with the state of the world lately, we need to expand our world beyond our own neighborhood.

Our latest project was inspired by the island nation of Barbados. While there are many beautiful and fascinating things about the country (read all about it here), we found our inspiration in their production of sugar cane. Sugar played a very important role in the economic growth of the country.

So, we concocted our own DIY sugar paint and let ourselves be inspired by the Caribbean nation of Barbados.

Mix up a batch of DIY sugar paint - made with corn syrup - to do this fun art project inspired by the country of Barbados.

Disclosure: This post contains Amazon Affiliate links. Please see my Disclosure Page for more details.

Mix up a batch of DIY sugar paint - made with corn syrup - to do this fun art project inspired by the country of Barbados.

In order to paint with sugar, we needed a liquid form of sugar. Light corn syrup was the first thing that popped in my head. I had remembered seeing other versions of DIY paint that used corn syrup, so I thought we’d give it a try.

I took a trip to the grocery store for supplies. The only thing I’ve ever used light corn syrup in was pecan pie and I’ve only made that a few times in my life. I never have corn syrup in my pantry. Other than the corn syrup, I only needed one other item: food coloring.

How to Make Corn Syrup Paint:

You’ll need a muffin tin (this makes for easy clean up), light corn syrup, and food coloring.

Add one to two tablespoons of corn syrup to each muffin cup. Exact measurements are not really that important, just eyeball it.  For two children, we didn’t use much paint, one tablespoon in each cup would have been enough.

Add five to six drops of food coloring to each cup. The more food coloring you use, the brighter the color.

Mix each with a spoon. Now you’re ready to paint.

Clean Up Hint: Our paint brushes cleaned easily with a little mild soap and water.  I used a bit of dish soap when I cleaned up.

Mix up a batch of DIY sugar paint - made with corn syrup - to do this fun art project inspired by the country of Barbados.

Once we made the paint, we were ready to create. We used our regular paint brushes and white drawing paper for our picture. You won’t want to use thin paper, but anything as thick as white copy paper will be fine.

While we painted, we learned about Barbados.

Did you know:

Barbados is tiny. It’s only 167 square miles in size with a population of just over 284,000.

It’s home to four different nesting turtle species: the loggerhead, green turtle, hawksbill turtle, and leatherback.

Cricket is the most popular sport.

Like many other Caribbean nations, tourism plays an important role in its economy.

Mix up a batch of DIY sugar paint - made with corn syrup - to do this fun art project inspired by the country of Barbados.

We created.

While we talked, we painted.

We leaned that our sugar paint was a little bit harder to use than our favorite type of paint – watercolors. The paint was thick and sticky.

We quickly learned to adapt. It was hard to make long sweeping lines, so we stuck with shorter lines.

It took more time to fill in a large area, so we had to go slowly.

Mix up a batch of DIY sugar paint - made with corn syrup - to do this fun art project inspired by the country of Barbados.

We veered off from creating actual pictures when my oldest daughter discovered what happened when you dripped the paint on your paper.

The paint didn’t run. It stayed in droplets. Cool!

Soon our creations turned into awesome abstract pictures using drip painting.

Mix up a batch of DIY sugar paint - made with corn syrup - to do this fun art project inspired by the country of Barbados.

It’s so much fun to create with a new medium. Especially when that new medium is linked to a fun geography lesson.

We learned about sugar and about Barbados all while creating beautiful artwork.

Now, I just have to figure out what to do with the rest of the corn syrup!

Special note: Make sure you take picture of the completed artwork. The paint did dry, but remained sticky. I wouldn’t recommend keeping the completed projects for too long. Photography is a great way to keep artwork without the paper clutter (or in this case, sticky paper).

Mix up a batch of DIY sugar paint - made with corn syrup - to do this fun art project inspired by the country of Barbados.

You may also enjoy one of these Project: Around the World art projects:

Layered Paper Underwater Scenes: Exploring The Bahamas Through Art

Painting on Music: Exploring Austria Through Art

Handprint Art: Exploring Argentina Through Art

Find all the Project: Around the World posts here.

  • « Go to Previous Page
  • Go to page 1
  • Go to page 2
  • Go to page 3
  • Go to page 4
  • Interim pages omitted …
  • Go to page 11
  • Go to Next Page »

Primary Sidebar

Footer

Categories

Archives

Copyright © 2023 · Designed by The Blog Surgery

Creative Family Fun uses cookies to improve your experience. These cookies provide feedback to our analytics and advertisers. We use the information to track views of the site, where you go and to know if you are a regular visitor or brand new as well as provide a personalized experience where possible. We'll assume you're ok with this, but you can opt-out if you wish.Accept Reject Read More
Privacy & Cookies Policy

Privacy Overview

This website uses cookies to improve your experience while you navigate through the website. Out of these, the cookies that are categorized as necessary are stored on your browser as they are essential for the working of basic functionalities of the website. We also use third-party cookies that help us analyze and understand how you use this website. These cookies will be stored in your browser only with your consent. You also have the option to opt-out of these cookies. But opting out of some of these cookies may affect your browsing experience.
Necessary
Always Enabled
Necessary cookies are absolutely essential for the website to function properly. This category only includes cookies that ensures basic functionalities and security features of the website. These cookies do not store any personal information.
Non-necessary
Any cookies that may not be particularly necessary for the website to function and is used specifically to collect user personal data via analytics, ads, other embedded contents are termed as non-necessary cookies. It is mandatory to procure user consent prior to running these cookies on your website.
SAVE & ACCEPT