• Skip to secondary menu
  • Skip to main content
  • Skip to primary sidebar
  • Skip to footer
  • Home
  • About
    • Email Me
    • Disclosure & Copyright
  • Start Here
  • Subscribe
  • Privacy Policy
  • Books for Moms

Creative Family Fun

Your one-stop shop for kids activities and family fun

  • Facebook
  • Instagram
  • Pinterest
  • Twitter
  • Spelling Activities
  • Family Fun
  • STEM
  • Movie Night
  • Toddler Activities

Learning Activities for Kids

10 Ways to Play With Snow

January 10, 2014 By Terri Thompson

I hope you enjoyed all the snow fun we’ve had here at Creative Family Fun this week.

The weather has been so cold here that we’ve had to do most of our snow play indoors. But if it’s warm enough, get outside!

Here are 10 more ways to have fun in the snow from some of the best Kid Activity Bloggers.

If you don’t have any snow to play with, the last few items can all be done indoors!

Disclosure: There are Amazon Affiliate and other affiliate links in this article which means, at no additional cost to you, we could receive compensation for our recommendations. You can read our full disclosure policy on our Disclosure Page for more details.

Make snow faces on your trees with The Chocolate Muffin Tree

Take some of your play kitchen toys outside and do a little snow cooking with My Nearest and Dearest

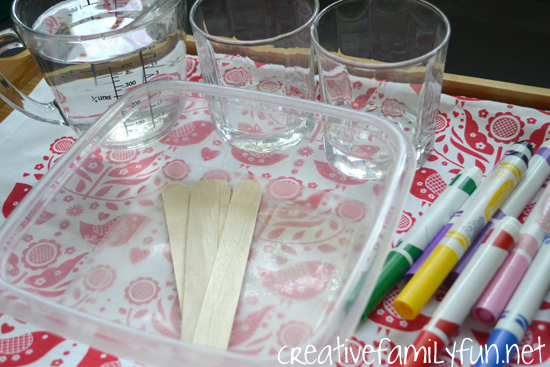
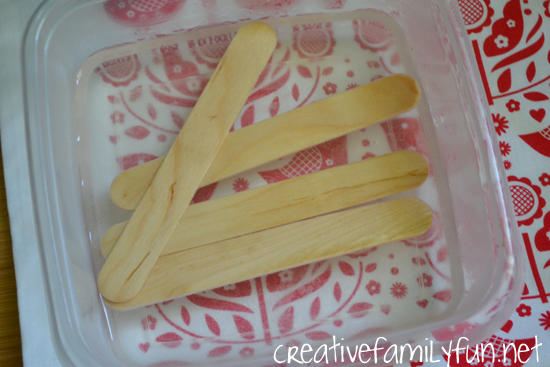
Do some eye-dropper snow painting with How Wee Learn

Explore snow flakes and look at them up close with The Chocolate Muffin Tree

Make potato heads in the snow with The Happy Hooligans

Blow a frozen bubble with What Do We Do All Day?

Create with ice jewels in the snow with Fireflies and Mud Pies

Make a snow storm in a bag with JDaniel4’s Mom

Experiment with fizzy melting snowmen with Inspiration Laboratories

Create a simple snow sensory & small world play set-up with Creative Family Fun

What are your favorite ways to play with snow?

Estimation Station for After School Fun

November 7, 2013 By Terri Thompson

How many rocks are in the jar?

How many pom poms?

Challenge your kids with this fun Estimation Station math game. How close can they get to the correct amount?

Challenge your kid's estimation skills with this fun estimation station math invitation. It's easy to set up and so much fun to play. #math #elementaryed #CreativeFamilyFun

I recently set up this Estimation Station to give my 1st grader a fun math challenge after school.

It took only a few minutes to set up. I just gathered a few items from around the house and had this math game ready in no time.

My daughter loved it and had a great time guessing and checking her answers.

Disclosure: There are Amazon Affiliate and other affiliate links in this article which means, at no additional cost to you, we could receive compensation for our recommendations. You can read our full disclosure policy on our Disclosure Page for more details.

Challenge your kid's estimation skills with this fun estimation station math invitation. It's easy to set up and so much fun to play.

Set up your Estimation Station

I found a selection of glass jars and loose parts. Any glass or clear container would work.

I filled my jars with rocks, LEGO blocks, and pom poms. These were all items that I had readily available.

Use whatever you have. Cotton balls, beads, dried pasta, paper clips, crayons, and bottle caps are some more possibilities for an estimation station.

I also wrapped some rubber bands around a wine cork. I got that great idea from No Time For Flashcards and their Estimate-Unwrap-Count challenge.

Challenge your kid's estimation skills with this fun estimation station math invitation. It's easy to set up and so much fun to play.

Add a chart

I then made a simple chart with a column for each item and one row for the estimates and another row for the actual amounts.

I had everything set up on the table waiting for my first grader to return home from school.

For an added challenge, you can have your kids make their own chart.

Challenge your kid's estimation skills with this fun estimation station math invitation. It's easy to set up and so much fun to play.

It’s time to estimate!

My first grader took one look at the project and dived right in.

She examined the jars and though hard about her estimates.

“Rubber bands are skinny, so there must be more of them,” was one of her thought processes.

She made her guesses with lots of thoughts and reasoning. There was no haphazard guessing going on with this project.

After she made her estimates, she counted the items to check her guesses.

I had her divide the items into groups of five before counting to sneak in some skip counting practice.

Challenge your kid's estimation skills with this fun estimation station math invitation. It's easy to set up and so much fun to play.

The results

We found some surprises.

Even though those rubber bands were skinny, there were only nine wrapped around the cork.

She was also quite pleased to see that two of her numbers, pom poms and LEGOs, were very close to the actual amount.

In one simple project that took me less than 10 minutes to set up, we practiced estimation, skip counting, and graphs. And, we had a lot of fun together in the process. Not bad for one simple math game!

Challenge your kid's estimation skills with this fun estimation station math invitation. It's easy to set up and so much fun to play.
If you enjoyed this estimation station math invitation, the above photo is perfect for sharing on Facebook or you can share on Pinterest.

You may also enjoy one of these fun math games:

Pick Two – A Fun LEGO Math Game

Counting On Card Game

Driveway Hundred Chart

Paper Plate Addition Game at Better Than Homework

Word Family Slam

October 30, 2013 By Terri Thompson

We’re still working on reviewing word families at home.

In order to review and have a little fun at the same time, I made this simple game for Miss 1st.

The best part about this game is that it’s so flexible. You can do this for any word family or do as we did and review several word families at once.

Disclosure: There are Amazon Affiliate and other affiliate links in this article which means, at no additional cost to you, we could receive compensation for our recommendations. You can read our full disclosure policy on our Disclosure Page for more details.

To Make the Game:

Using one or more index cards, write the word families you want to review, for example “ap” or “ill.” I often use this list of word families from EnchantedLearning.com for reference.

Next, take a pile of index cards and write the beginning letters. I used single letters (almost all the consonants) and letter blends (sh, sl, th, etc.)

Again, use a word family list to help you decide on the letters to use. You will want to have some cards with letters that will not make a word. Ex: “th” plus “ap” is not a word!

To Play the Game: 

Deal each person 3  beginning letter cards.

Lay down a word family card (ex: “ap”). Lay the extra beginning letter cards face down in a pile above your word family card.

The first player looks at her beginning letter cards to see if she can make a word. If she can, lay that card in front of the word family card. If not, she needs to discard (face up) a card that does not work and draw a new card. She will continue drawing and discarding until she finds a letter that makes a word.

Each play in turn tries to make a new word from the word family card.

At the beginning of each turn, the player will draw a card from extra pile. Each player should have 3 cards at the beginning of his turn.

Continue playing until there are no more beginning letter cards.

Note: Not all beginning letter cards will work for each word family. I wanted to add an additional challenge to the game by having Miss 1st determine if her combinations were a real word or not. Your child may pass by an combination that is an actual word, but not one they are familiar with. That’s okay. Let it pass if it’s an uncommon word or use the time to teach your child a new word. No matter what, have fun. Use the game as a fun way to sneak in a little extra review time!

Let me know if you play this game and if you like it!

Sight Word Islands

October 11, 2013 By Terri Thompson

As parents, we all want to help our kids be successful in school.

My daughters’ teachers will often let us know some of the things we can work on at home to complement the things they are learning in school.

If you have a child learning to read, one big thing you can do to help is to practice sight words at home.

Sight words are integral when learning to read. These are the words that are found in just about everything you read. They are best learned by memorization, since many cannot be sounded out.

Of course, no one actually wants to sit and memorize words, especially not your average 5 or 6 year old.

So, why not turn it into a game?

Since my girls love playing driveway games, I thought I’d bring some of our sight word review outside.

We got out the sidewalk chalk and took over the driveway with a game of Sight Word Islands.

Disclosure: There are Amazon Affiliate and other affiliate links in this article which means, at no additional cost to you, we could receive compensation for our recommendations. You can read our full disclosure policy on our Disclosure Page for more details.

To set up the game: 

In the center of our driveway, I drew a large star with a circle around it. This was the island we were trying to reach.

I then wrote sight words coming out from the star in all directions. Each word had a circle around it. These were our islands.

I used both words that my first grader needs to work on as well as words that she is already quite comfortable reading.

I then added three different starting points on the outer edges.

To play the game: 

Each girl stood on one of the start islands. Their goal was to jump from island to island all the way to the star.

But, in order to jump onto an island, you had to say the word out loud.

The shortest way to the star wasn’t always the easiest way!

My preschooler played along with us and took a lot of help from both Mom and big sister.

She has not reached the level of sight words yet, so we gave her a pass on actually knowing the words. Instead, she just had lots of fun jumping!

I love to turn learning into a game. Plus, anything that involves gross motor skills such as running and jumping is a hit with just about any child. Movement can go a long way in helping your child learn and remember. This post at Moving Smart explains why movement is so important. So, get moving and get learning!

What are some creative ways you’ve used for teaching sight words?

Practice sight words on the driveway by playing Sight Words Islands. It's a fun way to learn and move at the same time.
 

You May Also Like One of These Sight Word Activities:

DIY Sight Word Memory Game

Sight Word Tallies

Sight Word Pick and Spell

Frog Hop Sight Word Game at Mom Inspired Life

Sight Word Bracelets at Kitchen Floor Crafts

Science + Art: Craft Stick Bracelets

September 4, 2013 By Terri Thompson

Combine science and art to create this fun STEAM activity for kids, craft stick bracelets. Do a simple science experiment to bend your craft sticks and then decorate your new bracelet.

We once again combined art with science to make these fun craft stick bracelets.

How do you get a craft stick to bend without breaking? Can you transform it into a new shape?

We answered these questions with a fun experiment.

Combine science and art to create this fun STEAM activity for kids, craft stick bracelets. Do a simple science experiment to bend your craft sticks and then decorate your new bracelet.

Disclosure: There are Amazon Affiliate and other affiliate links in this article which means, at no additional cost to you, we could receive compensation for our recommendations. You can read our full disclosure policy on our Disclosure Page for more details.

Supplies Needed:

Craft sticks
Container large enough to hold your craft sticks flat
Water
Drinking glass
Markers, washi tape, paint (or whaterever you want to use to embellish your bracelets)

Combine science and art to create this fun STEAM activity for kids, craft stick bracelets. Do a simple science experiment to bend your craft sticks and then decorate your new bracelet.

Before beginning, we examined our craft sticks.

Do they bend? Not without breaking!

The dry wood is hard and strong, exactly why we use it for a building material. But, we can make them flexible.

Historically, steam has been used to bend wood for tool making, boats, musical instruments, furniture and more. We were able to get the same effect with boiling water.

Here’s how we did it:

Place your craft sticks flat in a container. We just used a plastic storage container.

Set this container someplace where you won’t need to move it for awhile.

Next, and it’s very important that a grown-up does this part, pour hot, boiling water over the sticks until they are submerged. You’ll need to leave them alone for 30-45 minutes. You may want to soak more craft sticks than you actually need to allow for mistakes.

Combine science and art to create this fun STEAM activity for kids, craft stick bracelets. Do a simple science experiment to bend your craft sticks and then decorate your new bracelet.

Once your craft sticks have soaked for at least 30 minutes, it’s time to get them out and try to bend them.

I emptied the water and we started testing our sticks. We found them much more flexible than when they were dry.

But, we did discover that if you tried to bend them too quickly, the sticks would still break. Our discovery was that we needed to bend them slowly and gradually.

Once we did that we placed them inside our drinking glasses to mold them. We left them in the glasses overnight to dry. Once they are dry, they will hold the curve shape.

Combine science and art to create this fun STEAM activity for kids, craft stick bracelets. Do a simple science experiment to bend your craft sticks and then decorate your new bracelet.

After pulling our sticks out of the glasses and marveling at their new shape, we decorated them to wear as bracelets.

The girls discovered they they could fit two curved sticks together to form a circle and make a perfect bracelet. It was fun and amazing to try to bend wood!

Have you ever tried this experiment? How did it work out for you?

Make This a Family Adventure

Cost: Under $5.00. Free if you already have craft sticks at home
Planning Time: 10 minutes (or less). You will need to gather your materials and boil your water.
Ages: Ideal for 5 years and up. Younger children can participate and have fun as long as parents are involved
Time Needed: 1 hour needed for first step, which included about 30-45 minutes of soaking time. The craft sticks will need to dry overnight and then you will need about 20-30 minutes for decorating.
Note: Because this project requires drying overnight, plan this for a time when you will be able to have family time two days in a row. It’s a very fascinating project that even adults will like to do, so it is well worth the time spent.

  • « Go to Previous Page
  • Page 1
  • Interim pages omitted …
  • Page 45
  • Page 46
  • Page 47
  • Page 48
  • Page 49
  • Interim pages omitted …
  • Page 61
  • Go to Next Page »

Primary Sidebar

Footer

Categories

Archives

Copyright © 2026 · Designed by The Blog Surgery

Creative Family Fun uses cookies to improve your experience. These cookies provide feedback to our analytics and advertisers. We use the information to track views of the site, where you go and to know if you are a regular visitor or brand new as well as provide a personalized experience where possible. We'll assume you're ok with this, but you can opt-out if you wish.Accept Reject Read More
Privacy & Cookies Policy

Privacy Overview

This website uses cookies to improve your experience while you navigate through the website. Out of these, the cookies that are categorized as necessary are stored on your browser as they are essential for the working of basic functionalities of the website. We also use third-party cookies that help us analyze and understand how you use this website. These cookies will be stored in your browser only with your consent. You also have the option to opt-out of these cookies. But opting out of some of these cookies may affect your browsing experience.
Necessary
Always Enabled
Necessary cookies are absolutely essential for the website to function properly. This category only includes cookies that ensures basic functionalities and security features of the website. These cookies do not store any personal information.
Non-necessary
Any cookies that may not be particularly necessary for the website to function and is used specifically to collect user personal data via analytics, ads, other embedded contents are termed as non-necessary cookies. It is mandatory to procure user consent prior to running these cookies on your website.
SAVE & ACCEPT