• Skip to secondary menu
  • Skip to main content
  • Skip to primary sidebar
  • Skip to footer
  • Home
  • About
    • Email Me
    • Disclosure & Copyright
  • Start Here
  • Subscribe
  • Privacy Policy
  • Books for Moms

Creative Family Fun

Your one-stop shop for kids activities and family fun

  • Facebook
  • Instagram
  • Pinterest
  • Twitter
  • Spelling Activities
  • Family Fun
  • STEM
  • Movie Night
  • Toddler Activities

Crafts

Project Kid: 100 Ingenious Crafts for Family Fun

June 14, 2014 By Terri Thompson

It’s no secret that my kids and I love to do crafts. We make up a lot of our own, but we also love to grab a craft book and have fun. So, when we first saw Project Kid: 100 Ingenious Crafts for Family Fun, we got excited to see all the fun crafting possibilities.

Disclosure: I received a free copy of this book in exchange for my honest review. This post also contains Amazon Affiliate and other affiliate links. Please see my Disclosure Page for more details.

Grab this great craft book for kids, Project Kid: 100 Ingenious Crafts for Family Fun, for hours of fun you can do with your kids. Great for tweens too!

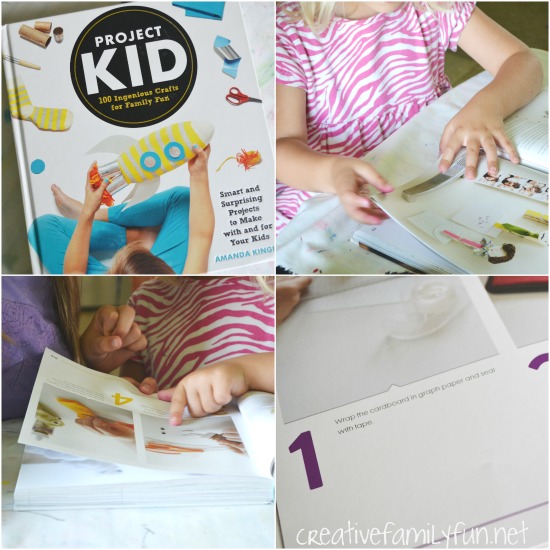
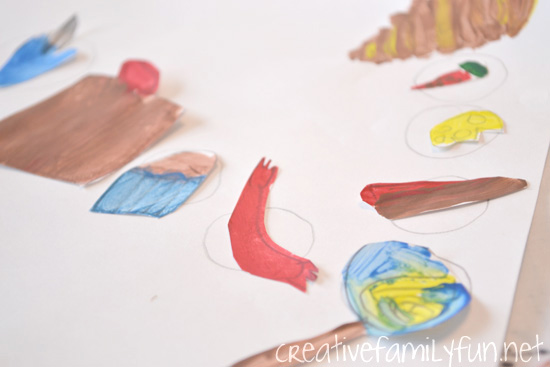
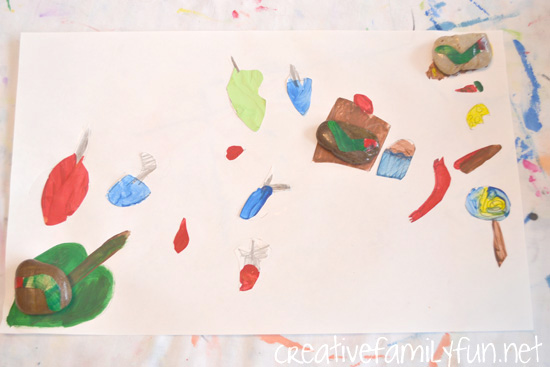
As soon as Project Kid: 100 Ingenious Crafts for Family Fun by Amanda Kingloff arrived at our front door, we were immediately smitten. The projects are awesome, smart, and loads of fun. You could make needlepoint flyswatters, a robot bank from recycled materials, or cut up your old t-shirts for some wearable baubles.

Project Kid is full of fun ideas!

Not only are the ideas inventive, but they also use a lot of reusable materials. You’ll be shopping in your recycle bin for many of your supplies.

Your kids will have so much fun. Elementary-aged kids and even tweens can tackle most of the projects themselves. Your younger kids will need mom or dads help for many of the projects.

Each project has step-by-step instructions with tons of photos. Even if you’re not confident with your crafting abilities, you can handle the projects in this book.

Grab this great craft book for kids, Project Kid: 100 Ingenious Crafts for Family Fun, for hours of fun you can do with your kids. Great for tweens too!

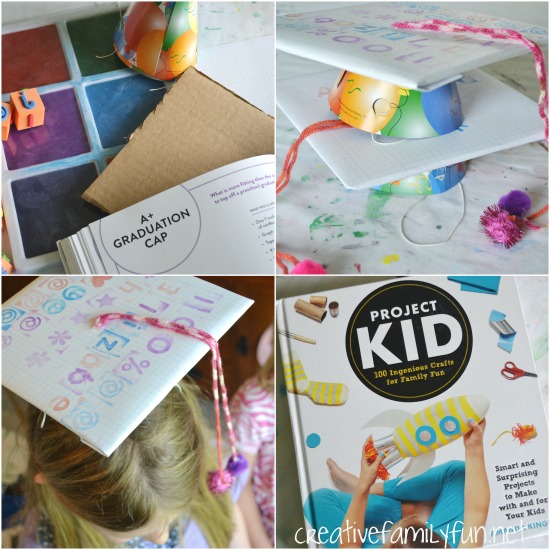
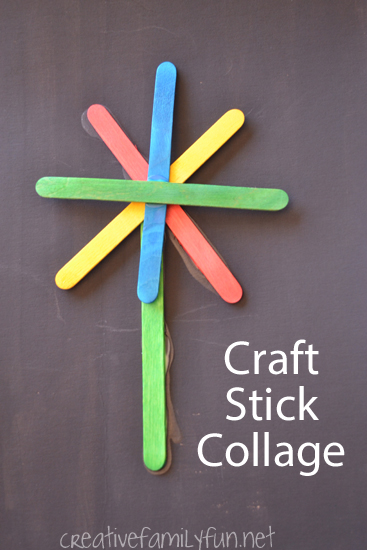
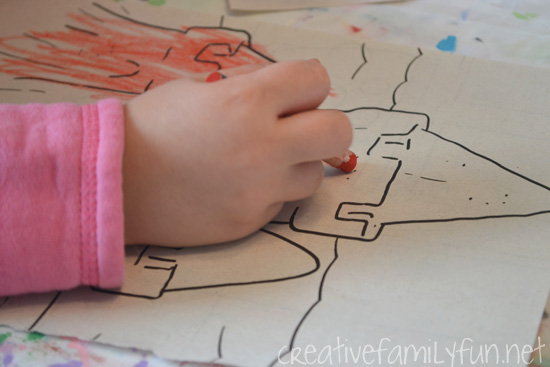
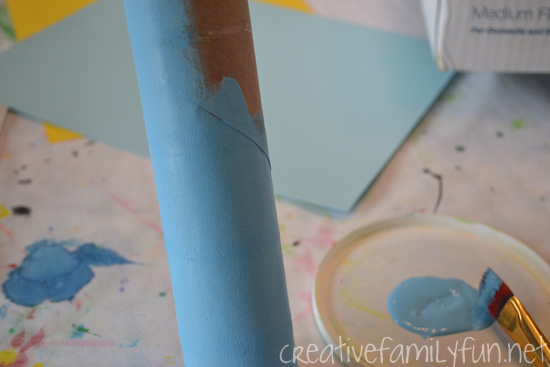
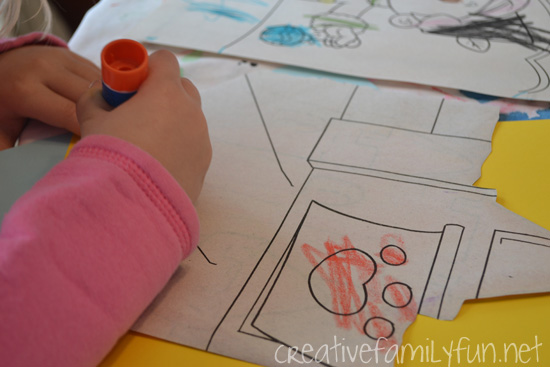
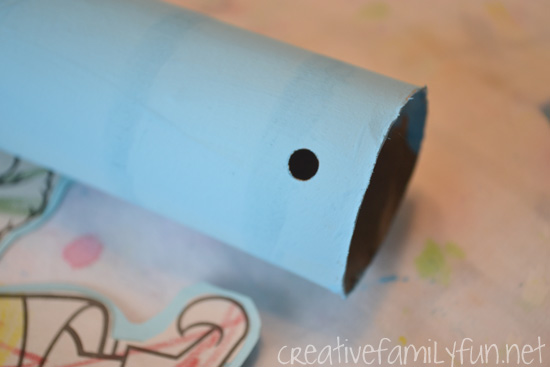
After leafing through the book a few times, we settled on the A+ Graduation Cap. After all, it was the end of the school year and I’ve got two kids ready to move on to the next grade level (2nd grade and kindergarten… oh my!).

The instructions were easy to follow and our hats turned out quite awesome. And, the girls never took them off!

I imagine we’ll be making many more of the projects in Project Kid: 100 Ingenious Crafts for Family Fun this summer.

Keep this book around and any day can turn into crafting day. It’s perfect for rainy days or any day when boredom hits. I loved it and I think you will too!

You can purchase Project Kid: 100 Ingenious Crafts for Family Fun through Amazon or any book store.

You may also like one of these craft projects:

Craft Stick Collage

Craft Stick Initial Plaque

Painted Turtle Rocks

Cardboard Cookies

Craft Stick Collage

May 21, 2014 By Terri Thompson

I’ve always got craft sticks in the supply closet.

We’ve used them for so many things, from picture frames to bracelets, and even for learning games like Math Fact Sticks.

There are so many things you can do.

This time, we kept it simple with a creative process art activity. We used a pile of colored craft sticks to make this Craft Stick Collage.

Grab a pile of colorful craft sticks and start creating this craft stick collage. You'll love the results of this craft stick art project for kids.

Disclosure: There are Amazon Affiliate and other affiliate links in this article which means, at no additional cost to you, we could receive compensation for our recommendations. You can read our full disclosure policy on our Disclosure Page for more details.

Supplies Needed:

Cereal box
Black paint
Colored craft sticks
White glue

If you don’t have any colored craft sticks, you can add an extra step to this project and paint plain crafts sticks in a few vibrant colors.

Grab a pile of colorful craft sticks and start creating this craft stick collage. You'll love the results of this craft stick art project for kids.

Prep your project

Since we were going to be gluing our craft sticks, I knew we needed something sturdy as a canvas. Plain paper would just not work.

So, we went to the recycling bin for a cereal box.

We cut off the two largest panels to use for our canvasses and painted them black. The colors of our craft sticks would pop so much more against the black than they would have against the cardboard brown.

Grab a pile of colorful craft sticks and start creating this craft stick collage. You'll love the results of this craft stick art project for kids.

Time to create your craft stick collage

Once the paint was dry, it was time to create.

We put the pile of crafts sticks in the middle of the table, pulled out a couple of bottles of glue, and got to work.

There were no rules and no suggestions. I walked away for awhile to get the girls to start creating without my input.

Grab a pile of colorful craft sticks and start creating this craft stick collage. You'll love the results of this craft stick art project for kids.

One of my daughters stacked and one laid them all side-by-side.

One started creating a colorful flower.

One had an idea in mind before she even started and the other went with the flow to see what would happen.

I love the way their craft stick art projects turned out. I love the way their minds work.

Grab a pile of colorful craft sticks and start creating this craft stick collage. You'll love the results of this craft stick art project for kids.

The contrast of the colored craft sticks with the black canvas on our craft stick collage was so striking. I’m so glad we used that instead of plain paper.

I think I need a pile of black cardboard around for creating. It would be a great canvas for chalk pastels and other collages. What would you use it for?

Grab a pile of colorful craft sticks and start creating. You'll love the results of this craft stick art project for kids.

You may also like one of these fun craft projects:

Egg Carton Fairy Houses

Classic Crafts ~ Pom Pom Caterpillar

Craft Stick Initial Plaque

Tie-Dye Suns

Are you looking for more preschool art projects?  Check out Three to Five: Playful Preschool. Get over 25 activities, 10 printables, and links to even more play-based preschool activities in this new e-book. Download it here.

https://www.creativefamilyfun.net/2014/05/three-to-five-playful-preschool.html 

Loon Craft and Learning About the Lakes of Minnesota

May 14, 2014 By Terri Thompson

Welcome to Minnesota!

The weather is finally getting nice. We’re know for our cold winters, with plenty of snow and temperatures plunging down below zero degrees Fahrenheit. But when the weather is nice, we get outside.

Minnesota marks the beginning of the Mississippi River in Itasca State Park. It begins as a small stream that you can walk across.

We’re known for our lakes and have over 90,000 miles of shoreline. That’s more than California and Florida – combined!

The lakes are where you often find our state bird, the common loon. And to celebrate our state bird, we’re going to make a fun loon craft.

Learn about Minnesota, its 10,000 lakes, and its state bird when you make this fun loon craft while you craft through all 50 states.

Disclosure: I received a free copy of the book, Travels With Charlie: Across the Midwest, in order to create this post. All opinions and activities are my own. This post also contains Amazon Affiliate and other affiliate links. Please see my disclosure for more details.

The common loon makes its summer home along the shorelines of our lakes. We’re always so excited to see a loon family, especially when their babies are little as they often ride on their mother’s back.

Even when you can’t see the loons, you can hear them. Their call is distinct and sometimes quite haunting.

If you want to hear a loon, check out the Cornell Lab of Ornithology All About Birds site. They have several recordings of a loon call.

Learn about Minnesota, its 10,000 lakes, and its state bird when you make this fun loon craft while you craft through all 50 states.

We are already big fans of the common loon and wanted to their image in an art project. This project is easy to do with a very pretty result.

Supplies Needed:

Watercolor paper (this works best, but you can use any white paper you have on hand)
Watercolors
Black construction paper
Oil pastels
Scissors
Glue

Learn about Minnesota, its 10,000 lakes, and its state bird when you make this fun loon craft while you craft through all 50 states.

Create your loon craft

We began by painting our background.

Loons are often found swimming on a lake, so we used blue and white watercolors to paint lake waters for our background.

Learn about Minnesota, its 10,000 lakes, and its state bird when you make this fun loon craft while you craft through all 50 states.

While waiting for our background to dry, we worked on our loon.

We drew a simple silhouette on the black construction paper and cut it out.

We copied an image found in the book, Loon at Northwood Lake by Elizabeth Ring. It’s a wonderful book to read if you want to learn more about the common loon.

Learn about Minnesota, its 10,000 lakes, and its state bird when you make this fun loon craft while you craft through all 50 states.

Next, we used our oil pastels to draw the details on the loon.

My preschooler drew a red eye and white details. She opted for spots instead of the checked pattern on the loons back and included the white belly. She’s never been one to get bogged down in the details!

Once our background was dry, we glued our loon to it.

Learn about Minnesota, its 10,000 lakes, and its state bird when you make this fun loon craft while you craft through all 50 states.

I love the results of our loon craft and love learning more about Minnesota. Travels With Charlie: Across the Midwest served as our jumping off point for this project. It was so much fun to hear about some of the more quirky finds in our state, like the Giant Prairie Chicken Statue and the Jolly Green Giant Statue. I’ve got to see them both sometime!

About Booking Across the USA

Booking Across the USA is a collaborative project with over 50 bloggers participating. Stop by the landing page and see all the other stops on the route. You’ll be able to find a project for each of the 50 states. What fun! Hope you enjoy traveling across all 50 states.

You May Also Enjoy One of These Fun Projects:

Aboriginal Dot Painting: Exploring Australia Through Art

Cityscape Printmaking

Moose Silhouette Paintings

US State Trading Cards at Royal Baloo

Four Seasons Mobile with Recycled Coloring Books

March 25, 2014 By Terri Thompson

Do your kids have a lot of coloring books? Mine certainly do.

We have so many that I decided to put them to use and make a Four Seasons Mobile.

We all worked as a team to put this together and I love how it turned out!

Recycle your old coloring books or coloring pages to find something to represent each of the seasons so you can make this Four Seasons Mobile.

Disclosure: There are Amazon Affiliate and other affiliate links in this article which means, at no additional cost to you, we could receive compensation for our recommendations. You can read our full disclosure policy on our Disclosure Page for more details.

Supplies Needed

Old coloring books
Colors
Scissors
Glue stick
Card stock or construction paper
Empty paper towel tube
Paint
Hole punch
String

Recycle your old coloring books or coloring pages to find something to represent each of the seasons so you can make this Four Seasons Mobile.

Find your pictures

For the first step of this project, the girls thumbed through their coloring books looking for pictures that would represent each of the four seasons.

The pictures are big so we only looked for one per season. We also made sure we picked pictures that were easy to cut out.

We found an elf (Hermey from Rudolph the Red Nosed Reindeer) for winter, a rabbit with a basket of flowers for spring, a sand castle for summer, and a basket of apples for fall. It wasn’t at all difficult to find a picture for each season.

If you don’t have any coloring books, you can find what you need by doing a quick online search for coloring pages.

The girls divided up the pictures and colored each one.

Recycle your old coloring books or coloring pages to find something to represent each of the seasons so you can make this Four Seasons Mobile.

Make your four seasons mobile

While the girls were coloring, I decided to help out and paint the paper towel tube. My help was not at all necessary, but I’m always looking for an excuse to paint something!

We chose a light blue from our stash of paint. But, you can use whatever color you want for this step.

Recycle your old coloring books or coloring pages to find something to represent each of the seasons so you can make this Four Seasons Mobile.

After the girls were done with their pictures, we cut then all out.

We then glued the pictures onto card stock.

We used colored card stock that went along with each season: blue for winter, light purple for spring, yellow for summer, and orange for fall.

I chose card stock for the stiffness, but if you don’t have card stock use construction paper instead.

Recycle your old coloring books or coloring pages to find something to represent each of the seasons so you can make this Four Seasons Mobile.

After the glue dried, we cut around each picture again leaving a small border of the card stock.

Recycle your old coloring books or coloring pages to find something to represent each of the seasons so you can make this Four Seasons Mobile.

Once our paper towel tube dried, we punched a hole in both ends. I tied one piece of string to both ends of the tube. I left the string long enough so that when you hold the string up, it forms a triangle with the paper towel tube.

We then punched a hole in the top of each picture. I tied a string through the hole in the picture, then wrapped it around the tube. We hung all the pictures at different levels so you could see each one while it was hanging.

Recycle your old coloring books or coloring pages to find something to represent each of the seasons so you can make this Four Seasons Mobile.

It’s always so much fun to sit around the table with my girls and work on a project. We were all so proud of this one and the girls couldn’t wait to show it off to Daddy once he got home.

What are you waiting for, dig out those old coloring books and turn them into a four seasons mobile!

You may also like one of these craft projects:

Sun and Rain Sensory Bottles

Hand Print Sunflower

Tie-Dye Suns

Bubble Wrap Trees for Every Season at To Be a Kid Again

The Very Hungry Caterpillar DIY Board Game

March 10, 2014 By Terri Thompson

Now that my girls are older, we’ve given away many of the board books we had when they were babies and toddlers. We’ve only kept a few, a few well-loved books that we still love to read.

One of the favorites that we kept was The Very Hungry Caterpillar by Eric Carle.

So, when Penguin Kids contacted us and asked us if we would like to help celebrate the 45th Anniversary of The Very Hungry Caterpillar by creating an activity, we jumped at the chance.

Create a simple DIY board game based on a classic children's book The Very Hungry Caterpillar by Eric Carle. It's a fun book activity your kids will love.

Once I asked the girls if they would like to help create a project based on the book, immediately began brainstorming.

My first grader was practically jumping out of her chair in excitement.

You see, she’s a big fan. BIG. She’s always loved Eric Carle books, but she’s become an even bigger fan of Eric Carle ever since they learned about him and his illustrations in art class.

Disclosure: There are Amazon Affiliate and other affiliate links in this article which means, at no additional cost to you, we could receive compensation for our recommendations. You can read our full disclosure policy on our Disclosure Page for more details.

My super-fan took over this project and my preschooler and I became her helpers. We were going to create our very own The Very Hungry Caterpillar board game.

Create a simple DIY board game based on a classic children's book The Very Hungry Caterpillar by Eric Carle. It's a fun book activity your kids will love.

After much discussion, the girls came up with the concept for the game.

You would begin on a big green leaf and your caterpillar would travel through all the yummy food until he reached a cocoon at the end.

Once that was figured out, we set to work making our game board.

The girls created the different food. My preschooler was in charge of the fruit and my first grader created all the junk food.

We then made a few little caterpillars to use as our game pieces.

Create a simple DIY board game based on a classic children's book The Very Hungry Caterpillar by Eric Carle. It's a fun book activity your kids will love.

After the paint dried, we cut out all of our food and our caterpillars.

We found a few rocks for our game pieces and used Mod Podge to secure our caterpillars to our rocks.

Create a simple DIY board game based on a classic children's book The Very Hungry Caterpillar by Eric Carle. It's a fun book activity your kids will love.

How to use Mod Podge

To use the Mod Podge, just brush an even coat over your rock.

Stick your caterpillar down and smooth it out.

Finally, brush another even coat of Mod Podge over the caterpillar and your rock.

The Mod Podge needs to dry for at least an hour.

It’s an easy process and my preschooler was able to do it all on her own.

If you don’t have Mod Podge, you can also create your game pieces by painting a caterpillar directly onto the rock.

Create a simple DIY board game based on a classic children's book The Very Hungry Caterpillar by Eric Carle. It's a fun book activity your kids will love.

Making our Very Hungry Caterpillar game board

After we cut out our food pieces, we arranged them on a sheet of 8-1/2 x 14 inch paper.

I had drawn the the leaf and the cocoon directly onto the paper.

We then laid out our food to make a path from the leaf to the cocoon. We started with the fruit and moved onto the junk food just like The Very Hungry Caterpillar did in the book.

Once we were satisfied with our arrangement, we glued each of the pieces of food down to our paper.

We grabbed a dice from another game and got ready to play.

Create a simple DIY board game based on a classic children's book The Very Hungry Caterpillar by Eric Carle. It's a fun book activity your kids will love.

Game play is simple

We kept the game play simple.

Each person starts on the leaf.

Throw the dice and move that many places.

The person who gets to the cocoon first wins.

It’s simple. It’s quick. And, it’s fun.

But, really, playing the game wasn’t what mattered in this project. What mattered was using our creativity to create the game and paying homage to a very favorite book at the same time.

Thank you Penguin Kids for extending the invitation to participate!

 You may also like one of these craft ideas:

In the Tall, Tall Grass Book + Craft

Cardboard Tube Yeti Craft for Kids

Easy Suncatcher Craft for Kids

The Very Lonely Firefly Paper Plate Craft at A Little Pinch of Perfect

  • « Go to Previous Page
  • Page 1
  • Interim pages omitted …
  • Page 15
  • Page 16
  • Page 17
  • Page 18
  • Page 19
  • Interim pages omitted …
  • Page 31
  • Go to Next Page »

Primary Sidebar

Footer

Categories

Archives

Copyright © 2026 · Designed by The Blog Surgery

Creative Family Fun uses cookies to improve your experience. These cookies provide feedback to our analytics and advertisers. We use the information to track views of the site, where you go and to know if you are a regular visitor or brand new as well as provide a personalized experience where possible. We'll assume you're ok with this, but you can opt-out if you wish.Accept Reject Read More
Privacy & Cookies Policy

Privacy Overview

This website uses cookies to improve your experience while you navigate through the website. Out of these, the cookies that are categorized as necessary are stored on your browser as they are essential for the working of basic functionalities of the website. We also use third-party cookies that help us analyze and understand how you use this website. These cookies will be stored in your browser only with your consent. You also have the option to opt-out of these cookies. But opting out of some of these cookies may affect your browsing experience.
Necessary
Always Enabled
Necessary cookies are absolutely essential for the website to function properly. This category only includes cookies that ensures basic functionalities and security features of the website. These cookies do not store any personal information.
Non-necessary
Any cookies that may not be particularly necessary for the website to function and is used specifically to collect user personal data via analytics, ads, other embedded contents are termed as non-necessary cookies. It is mandatory to procure user consent prior to running these cookies on your website.
SAVE & ACCEPT