• Skip to secondary menu
  • Skip to main content
  • Skip to primary sidebar
  • Skip to footer
  • Home
  • About
    • Email Me
    • Disclosure & Copyright
  • Start Here
  • Subscribe
  • Privacy Policy
  • Books for Moms

Creative Family Fun

Your one-stop shop for kids activities and family fun

  • Facebook
  • Instagram
  • Pinterest
  • Twitter
  • Spelling Activities
  • Family Fun
  • STEM
  • Movie Night
  • Toddler Activities

Crafts

Koala Bookmark Craft for Kids

March 20, 2017 By Terri Thompson

As we were brainstorming ideas for our set of animal bookmarks, my oldest daughter insisted that we include the top two cutest animals – koalas and pandas.

Apparently, this was determined by an unofficial polling of her 4th grade class.

I’ve got to agree with them. Koalas and pandas are very cute. And if a random sampling of 4th graders think they’re cute, then we’ll have to make some bookmarks.

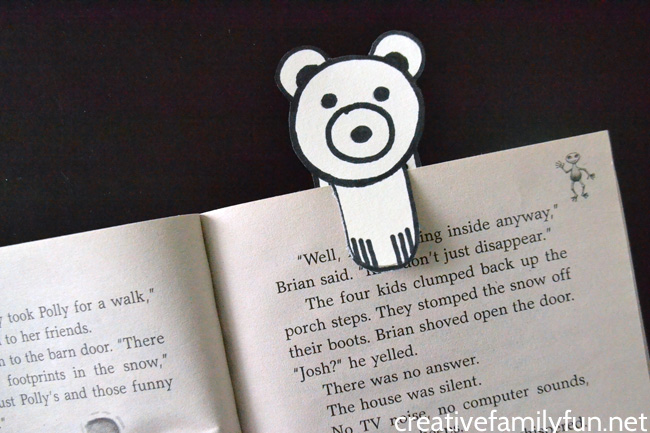
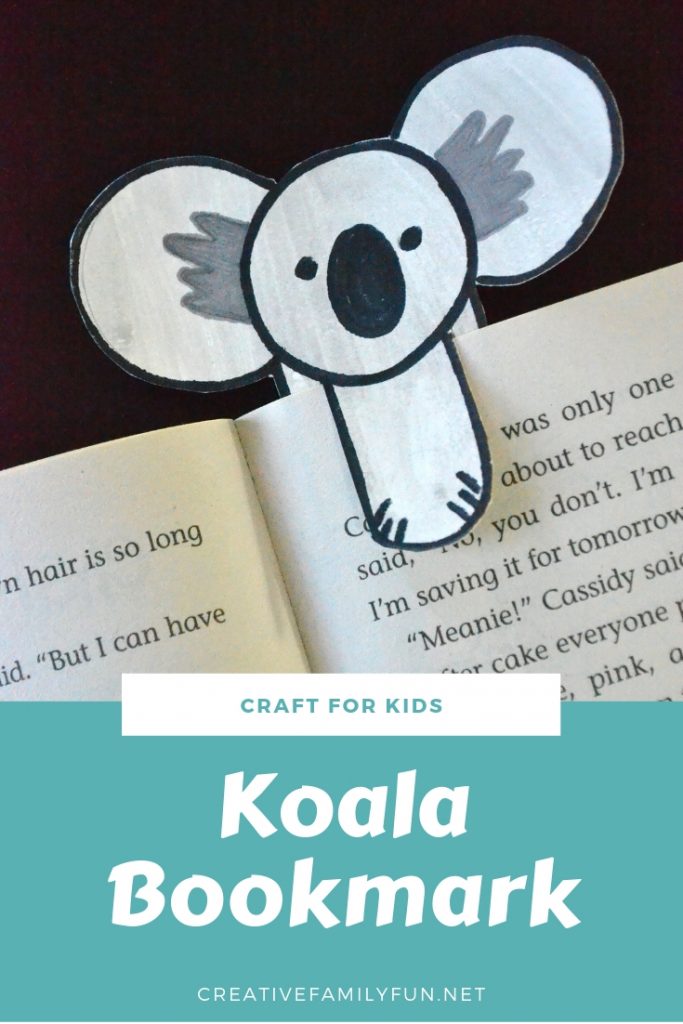
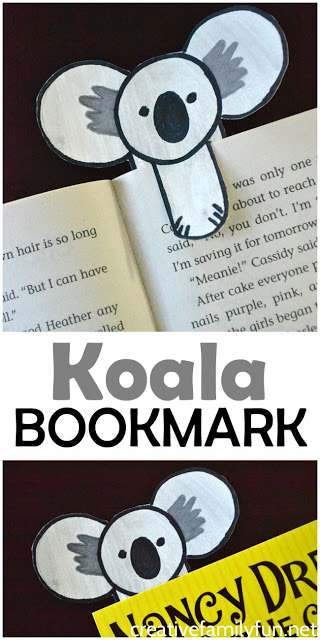
Let’s start with this fun koala bookmark.

Mark your place in your favorite book with this cute koala bookmark craft for kids. It's so easy to make with this step-by-step tutorial.

This bookmark is super easy to make if you follow these step-by-step instructions.

Let’s get drawing!

Disclosure: There are Amazon Affiliate and other affiliate links in this article which means, at no additional cost to you, we could receive compensation for our recommendations. You can read our full disclosure policy on our Disclosure Page for more details.

Supplies Needed:

Milk cap
White cardstock
Pencil
Ruler
Watercolors
Black Marker
Gray marker
Scissors
Craft knife

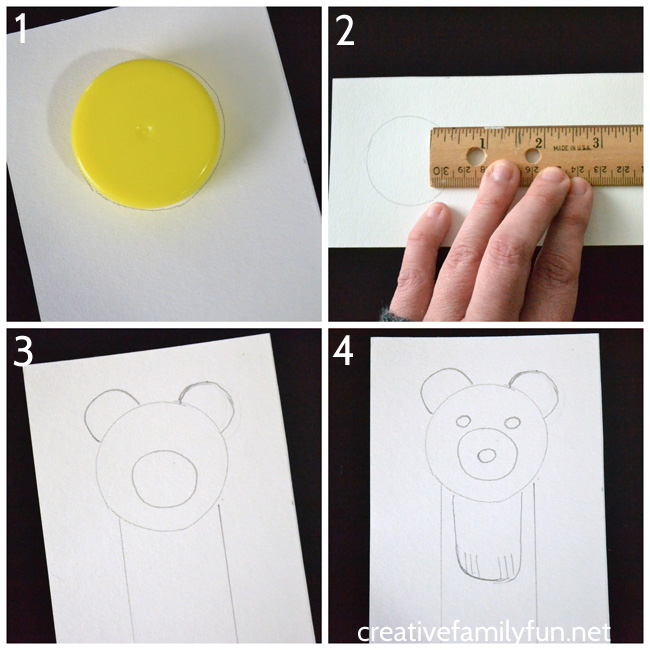
How to make your koala bookmark

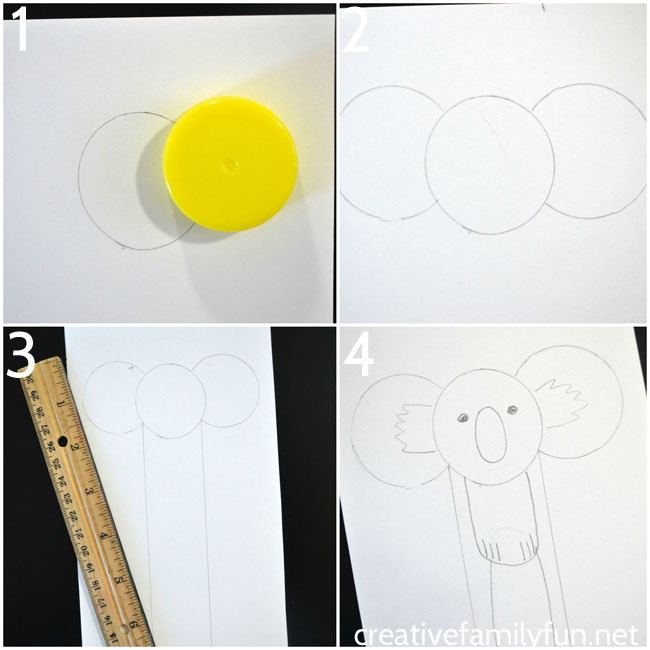
1. Trace your milk cap to make your koala head.

2. Trace the milk cap two more times for your ears. Position the ears a little bit higher than the head and just slightly overlapping.

3. Use the ruler to make two straight lines down from the head, about 6 inches long and about 1-1/4 inches cross. Connect the two parallel lines with a straight line across the bottom.

Add the details.

Draw a vertical oval in the center of the head for your nose. Add two small eyes on either side of the top of the nose.

Draw the insides of the ear.

Add the paws. Start from the bottom of the head and draw a long oval shape with straight sides about 1-1/4 inches long. Add little claw marks to the bottom.

Finally, starting from the bottom of the paws, draw a long oval for your koala belly.

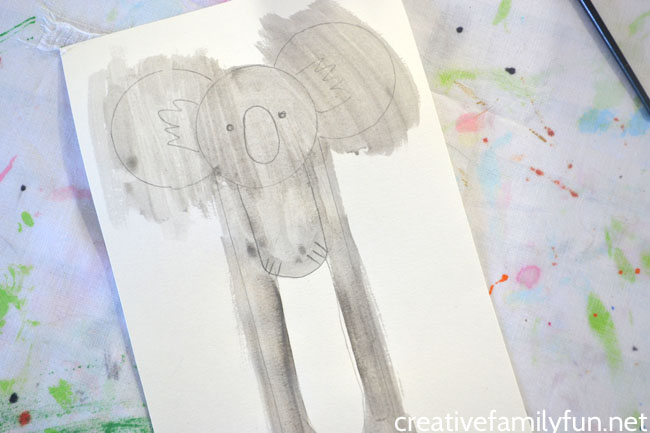
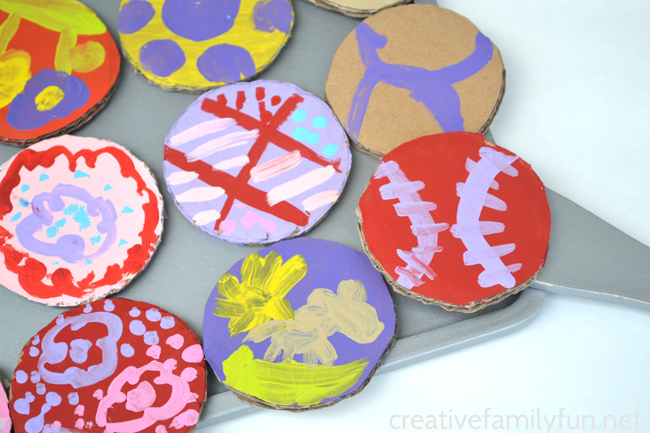
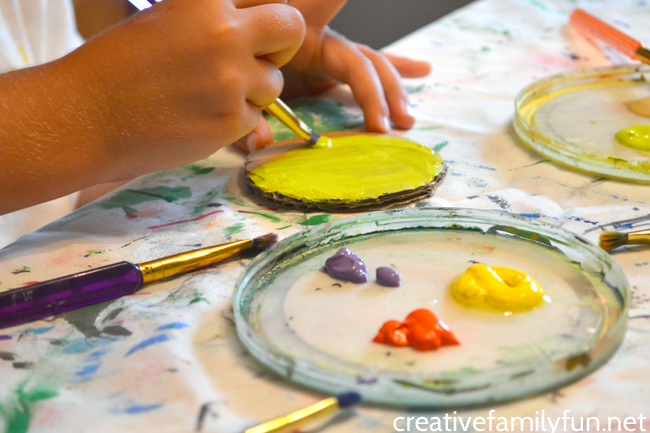
Now that you’ve drawn your koala, it’s time to add some color. Use gray watercolors to paint everything but the belly circle.

If you don’t have gray in your watercolor palette (I didn’t), just make a mixture of white and black to get the shade you want.

After the paint dries, use your gray marker to trace around your belly circle and also use it to color in the middle of your ears.

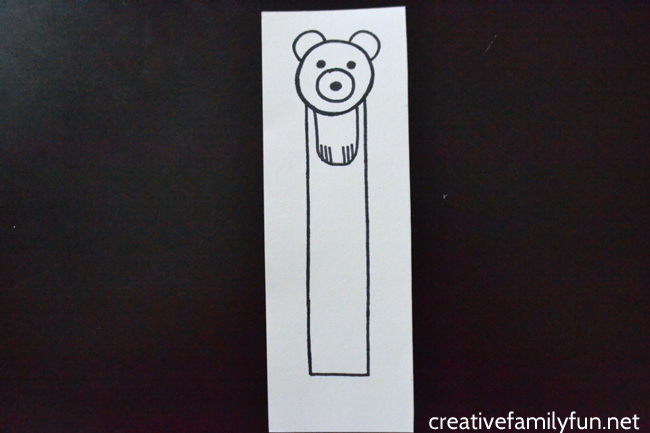
Use your black marker to color in your nose and to trace all other lines.
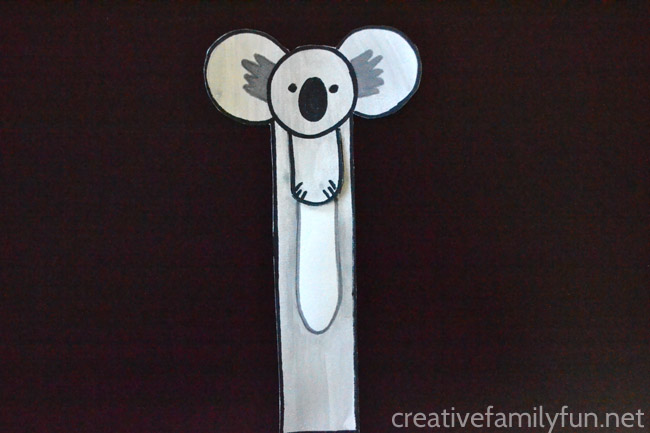
Time to cut.

Once you have all your lines traced, cut out your bookmark.

Use a craft knife to cut around your paws. You want to leave the paws attached to the head, so do not cut that line.

Note: I have this ceramic craft knife that I love to use. It’s easier to hold, stays sharper, and is much safer than a retractable craft knife. If you are ready to let your child use a tool like this, this is a great choice. If not, have an adult do this step.

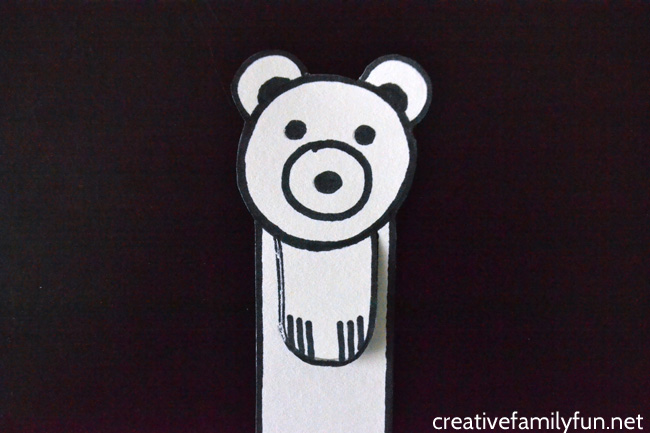
Now your super-cute koala bookmark is ready to go. Go impress all your favorite 4th graders. They’ll love this koala bookmark!

You may also like one of these fun animal crafts:

Polar Bear Bookmark

Panda Bookmark Craft

Cardboard Tube Bear Craft

Paper Plate Koala Craft at I Heart Crafty Things

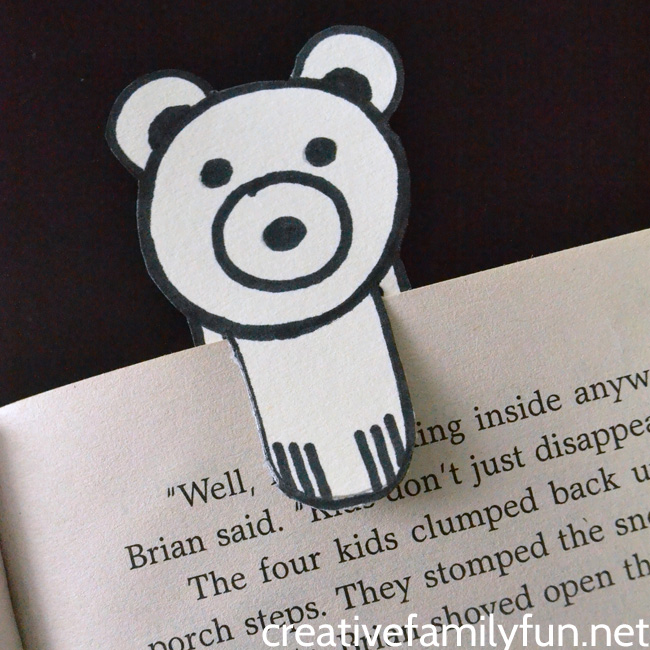
Use your koala bookmark to save your place in one of these fun books

With such a cute bookmark, you need an awesome book to read. Here are some great choices to read along with your new bookmark:

Do you want to do more activities with your kids?

Join our fun Facebook community, Creative Family Fun for Busy Families, for daily activities that are great for kids and families. We’ll chat, share, and have fun. It’s a safe and private place to share ideas for family and kids activities.

I’d love for you to join me! Just click the link below, request to join, and answer the questions (they’re easy, I promise). Come join the fun! Join the Creative Family Fun for Busy Families community here.

All-Star Sports Reading Pointers

February 21, 2017 By Terri Thompson

Have you ever watched a kid use their fingers to track reading across a page?

It’s such a natural thing and a great way to train their eyes to track the words on a page.

Fingers aren’t the only thing you can use to track the words. You can have a little fun with homemade reading pointers. These All-Star Sports Reading Pointers are perfect for little sports fans that will make reading so much more fun.

Hit a home run with these simple All Star Sports Reading Pointers that will help your new reading keep their place on a page.

Disclosure: Thank you to CraftProjectIdeas.com for providing the supplies to make this project. The idea is my own. This post also contains Amazon Affiliate links. Please see my Disclosure Page for more details.

These reading pointers are so easy to make. I made this set in just a few minutes. It would be so easy to make enough for an entire classroom.

Supplies Needed

Colorful craft sticks
Sports-themed foam stickers
Black marker

CraftProjectIdeas.com has a great set of sports stickers that are perfect for these reading pointers.

Hit a home run with these simple All Star Sports Reading Pointers that will help your new reading keep their place on a page.

How To Make Your Reading Pointers

You’ll need one craft stick and two identical stickers for each craft stick.

Take the backing off one sticker and put it at the top of your craft stick. Make sure you plenty of open areas on your sticker. (See the picture above.)

Place a second stickers directly on top of the sticky side of your first sticker sandwiching the craft stick in between. Press tightly so that the two stickers stick together tightly.

Hit a home run with these simple All Star Sports Reading Pointers that will help your new reading keep their place on a page.

Use your black marker to add a fun and curvy dashed line all the way down your stick.

That’s it! Your reading pointers are ready to use.

Hit a home run with these simple All Star Sports Reading Pointers that will help your new reading keep their place on a page.

If you’ve got a young reader at home, it’s very beneficial to keep a supply of reading pointers.

Keep them accessible so your kids can use them whenever they feel like they need them.

It’s a great way to help them practice reading and gain confidence in their reading ability. They’ll have a little help along the way.

They also easily double as a bookmark and they’re reading and waiting for the next time they pick up a book.

Hit a home run with these simple All-Star Sports Reading Pointers that will help your new reading keep their place on a page.


If you enjoyed this post, the above picture is perfect for sharing on Facebook. Or, you can pin the picture below.

Hit a home run with these simple All-Star Sports Reading Pointers that will help your new reading keep their place on a page.


You may also like one of these posts:

Stacking Rhyming Words

Punctuation Stickers

Magic Wand Reading Pointers at Creative Family Fun

Fun Reading Pointers You Can Make or Buy at Creative Family Fun

Polar Bear Bookmark

January 13, 2017 By Terri Thompson

We never have enough bookmarks at our house.

I don’t know what happens to them. But, I suspect they’re hanging out the missing socks and hair ties.

Where do those things disappear to?

I’m constantly grabbing any scrap of paper I can find to mark my place just because I can’t find an actual bookmark.

I’d prefer to use something cute, like this adorable peeking polar bear bookmark.

Mark the pages in your book with this cute polar bear bookmark. It's so easy to make when you follow along with this step-by-step tutorial.

Don’t worry if you don’t think you’re very good at drawing. This polar bear is very east to draw and I’ll walk you through the process step-by-step.

This easy craft is perfect for kids and tweens, though they may need a little bit of adult help with the art knife.

Disclosure: There are Amazon Affiliate and other affiliate links in this article which means, at no additional cost to you, we could receive compensation for our recommendations. You can read our full disclosure policy on our Disclosure Page for more details.

Supplies Needed:

White cardstock
Milk cap
Pencil
Ruler
Black Marker
Scissors
Craft knife

Mark the pages in your book with this cute polar bear bookmark. It's so easy to make when you follow along with this step-by-step tutorial.

How to make your polar bear bookmark:

Start by tracing your milk cap. This will be the polar bear’s head.

Next, use the ruler to make two straight lines down from the circle, about 6 inches in length and 1-1/4 inches apart. Connect the two lines with another straight line at the bottom.

Now, go back to your head. Add two small half circles for the ears. Also add another circle inside the head in the bottom half. This is your bear’s snout.

Add two little eyes and a nose.

Finally, draw your paws. Start from your head and draw a long oval-ish shape. Draw three simple claws on each side.

Mark the pages in your book with this cute polar bear bookmark. It's so easy to make when you follow along with this step-by-step tutorial.

Finish your bookmark

Trace the entire bookmark with your black marker.

Carefully cut out around the entire bookmark. Use the black marker to color in any white spots on the edges left over from your cutting.

Finally, use the craft knife to cut around the two sides and the bottom of the paws. You do not want to cut the top edge under the chin.

I have this ceramic craft knife that I love to use. It’s easier to hold, stays sharper, and is much safer than a retractable craft knife. If you are ready to let your child use a tool like this, this is a great choice. If not, have an adult do this step.

Mark the pages in your book with this cute polar bear bookmark. It's so easy to make when you follow along with this step-by-step tutorial.

Having this cute little guy peeking up from my book just makes me want to settle in and start reading.

Hopefully my polar bear bookmark won’t end up with all the other missing bookmarks. I want to keep this one around.

Mark the pages in your book with this cute polar bear bookmark. It's so easy to make when you follow along with this step-by-step tutorial.

If you enjoyed this post, the above photo is perfect for sharing on Facebook. You can also Pin the below photo for future reference.

Mark the pages in your book with this cute polar bear bookmark. It's so easy to make when you follow along with this step-by-step tutorial.

You may also like one of these fun craft projects:

Cat Bookmark

Koala Bookmark

Cardboard Tube Penguin

10 Ways to Play and Learn About Polar Animals

Polar Bear Torn Paper Craft at Easy Peasy and Fun


Cardboard Cookies

October 19, 2016 By Terri Thompson

My girls would love it if they could decorate sugar cookies on a weekly basis.

I, on the other hand, don’t have the energy or the metabolism to bake them more than a couple of times a year. Don’t even get me started on the clean-up!

That’s why one day, after staring down a pile of cardboard boxes, we decided to get out our paint and make up a batch of Cardboard Cookies.

This is a simple cardboard kids craft that resulted in a fun toy to add to our play kitchen.

Let’s get baking!

Making a batch of cardboard cookies is a simple and fun project. So, get out some recycled materials to make this cardboard kids craft.
Disclosure: This post contains Amazon Affiliate links. Please see my Disclosure Page for more details.

Make up a batch of cookies

We started with a pile of cardboard circles. I used one of our drinking glasses and traced about a dozen circles on a cardboard box. Then, I cut them all out.

I didn’t have my girls do this part because I used thick corrugated cardboard. You need sharp scissors and a little bit of strength to do the cutting.

If you want (or need) your kids to do the cutting, you can also make your cookies with thin cardboard. Use an empty cereal box or a cracker box instead.

Making a batch of cardboard cookies is a simple and fun project. So, get out some recycled materials to make this cardboard kids craft.

It’s time to decorate

Once I had a pile of cookies ready, it was time to decorate. It was so much fun!

We gathered around the table and got out our tub full of craft paint. How were we going to decorate our cookies?

We channeled our inner cookie decorators and got to work.

Making a batch of cardboard cookies is a simple and fun project. So, get out some recycled materials to make this cardboard kids craft.

We picked our favorite cookie colors and started painting.

We added patterns, flowers, polka dots, and small scenes. We even turned one into a purple and red baseball.

There are so many ways to decorate a cardboard cookie.

Making a batch of cardboard cookies is a simple and fun project. So, get out some recycled materials to make this cardboard kids craft.

I always love a good project that my girls and I can gather around the table and make together. This project was the perfect choice. We chatted, painted, and had a very enjoyable afternoon.

It was as much fun as if we were decorating real cookies. And, it was much much easier on my waistline.

Making a batch of cardboard cookies is a simple and fun project. So, get out some recycled materials to make this cardboard kids craft.


You may also like one of these fun craft projects:

Salt Dough and Pony Bead Decorations

Egg Carton Fairy Houses

Craft Stick Initial Plaque

Puffy Paint Cupcake Craft at I Heart Arts n Crafts


Fun With Elephant & Piggie: Cardboard Tube Piggie

September 7, 2016 By Terri Thompson

“Hi Piggie!”

“Hi Gerald!”

“Come play with me!”

Don’t you just love the Elephant and Piggie books by Mo Willems?

Since we already made our Cardboard Tube Elephant, it’s time to make his best friend, Piggie. You can’t have Elephant without Piggie.

Let’s get going on our Cardboard Tube Piggie craft!

Do you love the Elephant and Piggie books by Mo Willems? You'll love making this cardboard tube Piggie craft to go along with the books.

Disclosure: This post contains Amazon Affiliate links. Please see my Disclosure Page for more details.

Supplies Needed:

Cardboard tube (a toilet paper tube is the perfect size)
Thin cardboard (from a cereal or cracker box)
Light pink craft paint
Paintbrush
Scissors
White glue
Black permanent marker (a Sharpie is perfect)

Do you love the Elephant and Piggie books by Mo Willems? You'll love making this cardboard tube Piggie craft to go along with the books.

How to make your cardboard tube Piggie craft

Before you start painting, you’ll want to draw Piggie’s ears and snout on your thin cardboard. Draw two triangles for the ears. Draw an oval, about the same width as your cardboard tube for the snout.

Paint your cardboard tube, ears, and snout with the the pink paint. Let it all dry.

If you can’t stand the wait, this is the perfect time to read a couple of your favorite Elephant and Piggie books.

Do you love the Elephant and Piggie books by Mo Willems? You'll love making this cardboard tube Piggie craft to go along with the books.

Once everything is dry, cut out your ears and snout.

Use the black marker to draw two parallel vertical lines on your snout for Piggie’s nose.

Do you love the Elephant and Piggie books by Mo Willems? You'll love making this cardboard tube Piggie craft to go along with the books.

Glue the snout about 1/3 of the way down from the top of your cardboard tube.

Glue the ears to the top of the tube. Make sure you leave room for eyes in between the snout and the ears.

After you’ve finished gluing, use your black marker to make two small ovals above the snout for Piggie’s eyes.

Add a big smile directly underneath the snout.

Piggie is done! Now, you’ve got two fun friends to help you act out all the Elephant and Piggie books. You can find the instructions for making Elephant here.

Do you love the Elephant and Piggie books by Mo Willems? You'll love making this cardboard tube Piggie craft to go along with the books.

You may also be interested in one of these fun book projects:

Fun with Elephant & Piggie: Cardboard Tube Elephant

Cardboard Tube Yeti Craft inspired by The Thing About Yetis

Balloons Over Broadway: Book and Craft

The Very Hungry Caterpillar DIY Board Game

Paper Plate Elephant & Piggie at Glued to My Craft Blog

  • « Go to Previous Page
  • Page 1
  • Interim pages omitted …
  • Page 12
  • Page 13
  • Page 14
  • Page 15
  • Page 16
  • Interim pages omitted …
  • Page 31
  • Go to Next Page »

Primary Sidebar

Footer

Categories

Archives

Copyright © 2026 · Designed by The Blog Surgery

Creative Family Fun uses cookies to improve your experience. These cookies provide feedback to our analytics and advertisers. We use the information to track views of the site, where you go and to know if you are a regular visitor or brand new as well as provide a personalized experience where possible. We'll assume you're ok with this, but you can opt-out if you wish.Accept Reject Read More
Privacy & Cookies Policy

Privacy Overview

This website uses cookies to improve your experience while you navigate through the website. Out of these, the cookies that are categorized as necessary are stored on your browser as they are essential for the working of basic functionalities of the website. We also use third-party cookies that help us analyze and understand how you use this website. These cookies will be stored in your browser only with your consent. You also have the option to opt-out of these cookies. But opting out of some of these cookies may affect your browsing experience.
Necessary
Always Enabled
Necessary cookies are absolutely essential for the website to function properly. This category only includes cookies that ensures basic functionalities and security features of the website. These cookies do not store any personal information.
Non-necessary
Any cookies that may not be particularly necessary for the website to function and is used specifically to collect user personal data via analytics, ads, other embedded contents are termed as non-necessary cookies. It is mandatory to procure user consent prior to running these cookies on your website.
SAVE & ACCEPT