• Skip to secondary menu
  • Skip to main content
  • Skip to primary sidebar
  • Skip to footer
  • Home
  • About
    • Email Me
    • Disclosure & Copyright
  • Start Here
  • Subscribe
  • Privacy Policy
  • Books for Moms

Creative Family Fun

Your one-stop shop for kids activities and family fun

  • Facebook
  • Instagram
  • Pinterest
  • Twitter
  • Spelling Activities
  • Family Fun
  • STEM
  • Movie Night
  • Toddler Activities

Crafts

Textured Eagles

March 26, 2012 By Terri Thompson

During our bird week, we wanted to make sure we talked about one of our favorite and one of the most impressive birds, the bald eagle.

Disclosure: There are Amazon Affiliate and other affiliate links in this article which means, at no additional cost to you, we could receive compensation for our recommendations. You can read our full disclosure policy on our Disclosure Page for more details.

We found a wonderful book about eagles at our library, Soaring with the Wind: The Bald Eagle by Gail Gibbons. After learning all we could about the bald eagle, we decided to make a couple of our own.

The first thing we needed to do for our eagles was to make our white paper look textured and mimic the look of feathers.

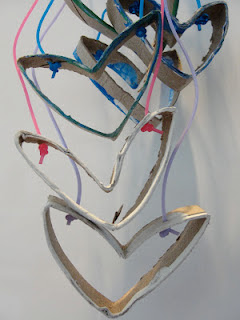
I looked all over our house trying to figure out what would work best. Finally, I hit up our collection of empty cardboard tubes. I flattened a couple of tubes and cut strips partially up the tubes.

We used white paint on top of white paper and painted our texture all over. This was by far the most fun part of the whole project!

After our paint dried, I drew a simple eagle head shape on the white paper. I kept it simple so that the girls could cut it out.

I drew the shape on the back of the paper so we wouldn’t have to worry about the pencil lines showing up on our project.

We also cut out a simple eye and beak from yellow paper. The girls glued these pieces on a sheet of blue construction paper.

Finally it was time for the finishing touches.

We used markers and pencils to add any additional detail that were needed.

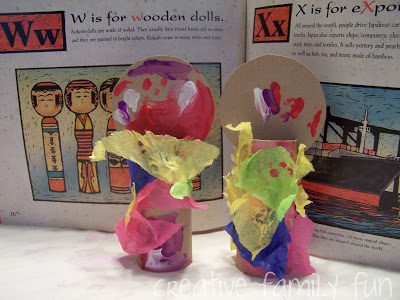
Lizzie’s wonderful creation is the top pictures and AJ’s is below. Note that AJ’s eagle is going to have a bit of trouble eating. It’s a good thing he’s so cute!

Our bird fun hasn’t ended. We’re going to keep on learning about them and doing projects for the next week (or two)! We are having too much fun learning about, crafting and exploring the world of birds.

Egg Carton Rainbows

March 12, 2012 By Terri Thompson

Instead of recycling the egg carton we just emptied, we decided it would be much more fun to craft with it.

With all the spring-like weather we’ve been having and the upcoming St. Patrick’s Day holiday, rainbows have been on our mind.

We decided to transform our egg cartons into pretty rainbow mobiles.

Disclosure: There are Amazon Affiliate and other affiliate links in this article which means, at no additional cost to you, we could receive compensation for our recommendations. You can read our full disclosure policy on our Disclosure Page for more details.

I cut the egg carton up into individual pieces and gave each girl seven pieces, one for each color of the rainbow.

Lizzie, who considers herself an expert on rainbow colors, wanted to make sure she did hers correctly using red, orange, yellow, green, blue, indigo, and violet.

AJ just wanted different colors and since her favorite color is yellow, she wanted a couple of extra yellow pieces!

We painted the outside of each piece and then let them dry.

After they were dry, I grabbed some thick thread, a large needle, and some tape. Lizzie helped me thread pieces on the string.

I used the tape inside the egg carton piece to hold down the thread so I could space the pieces out.

Due to her expert status, Lizzie was able to help me get the pieces on in the correct order.

Then, we hung them up in the window. And, they were very pretty there.

But, they only stayed there long enough for me to get some pictures, then down they came. Apparently, they were much more fun as a toy!

We love rainbows and will probably do more rainbow crafts this spring. What is your favorite rainbow craft?

10 Ways to Create With Cardboard Tubes

March 8, 2012 By Terri Thompson

Quite possibly one of our favorite things to create with is the lowly cardboard tube.

But, really, it’s the perfect craft supply. It’s readily available, completely frugal, and very “green.

Is there anything better?

I’ve rounded up 10 fun projects to do with the empty cardboard tube

Disclosure: There are Amazon Affiliate and other affiliate links in this article which means, at no additional cost to you, we could receive compensation for our recommendations. You can read our full disclosure policy on our Disclosure Page for more details.

1. Make a marble run. Check out this post from Teach Preschool to see how to use a few magnets and some cardboard tubes to make a really fun marble run.

2. Turn them into animals! Little Wonders Days shares these cute cardboard tube squirrels.

(via Little Wonders’ Days)

3. Make a stethoscope. All For the Boys shows you how to make these fun & easy DIY stethoscopes.

4. Make monsters! Check out our fun googly-eyed monsters.

5. Make pretend play props. We used cardboard tubes to make logs when we set up our small world pond.

6. Make jewelry. Kitchen Counter Chronicles made these adorable heart necklaces. (And I can attest to the cuteness! My girls received some in a Valentines swap!) Red Ted Art made fun wrist watches.

(via Kitchen Counter Chronicles)

7. Make caterpillars. The Iowa Farmer’s Wife shows you how to make this colorful caterpillar from an empty cardboard tube and pipe cleaners.

8. Explore a new culture. We crafted these fun kokeshi dolls while learning about Japan.

9. Make puppets. Check out these amazing marionettes from Red Ted Art!

10. Use them as stamps. We squished them into a heart shape and had fun stamping! You could try any shape such as a circle, star, diamond, or oval.

*Bonus Activity – Let baby play with a few empty cardboard tubes for a fun sensory experience. Baby would also have fun putting them in and out of a box or basket! (As with all things, make sure to supervise baby while he’s playing with the cardboard tubes.)

What have you made lately with an empty cardboard tube?

Favorite Craft Supplies From the Recycle Bin

March 5, 2012 By Terri Thompson

It’s no secret that we’re constantly digging around in our recycle bin for our craft projects.

So, I thought I would share with you some of my favorite recycle bin supplies.

These are the items that don’t even make it to the recycle bin anymore; they go straight to our craft supplies bin.

Disclosure: There are Amazon Affiliate and other affiliate links in this article which means, at no additional cost to you, we could receive compensation for our recommendations. You can read our full disclosure policy on our Disclosure Page for more details.

1. Old Sheets – A couple of years ago, I purchased an old flat sheet for a dollar from our local thrift store. We use this all the time. I always spread it on the table before we get out the paint, glue, glitter, or other messy craft supply. It’s helpful for catching bits of play dough and also very useful in building forts! It’s easy to wash and it doesn’t matter if it gets stained.

2. Cardboard Tubes – Whether it’s an empty toilet paper tube, paper towel roll, or gift wrap roll, we’ve used them all! They’re the perfect (and most frugal) medium for 3-D crafting.

3. Plastic Lids – These are perfect for holding paint or glue. The large flat surface makes it easy for painting with unusual items, such as sponges, stamps, cardboard tubes, cotton balls, etc. I usually have one lid for each girl with her choice of paint color(s).

4. Egg Carton – There are so many uses for an egg carton. Use it to hold small supplies, such as beads, paper scraps, or beans. They’re a fun addition to 3-D artwork. In addition, they also make a fun, easy-to-hold stamp for print making.

5. Old Cards & Postcards – We use these to make collages, play post office, make paper chains, or even bookmarks.

6. Tissue Paper Scraps – This is another medium we use a lot in collages. We also use it a in our stained glass window crafts.

7. Magazines – Magazines are the perfect place to find pictures to manipulate. Make silly faces on pictures of people. Cut out various pictures to use in collages or other pictures. Use wadded up pages for painting instead of a paint brush. The possibilities are endless!

8. Cardboard Boxes – What can’t you do with a cardboard box? Make sculptures, store craft supplies, cut it up anytime you need a sturdy surface for a craft project, color it, paint it, make a dollhouse, or a barn. If you can imagine it, you can make it with a cardboard box!

Now you’ve seen our favorite craft supplies from the recycle bin. What are your favorites?

The Snowy Day Book and Craft

February 29, 2012 By Terri Thompson

We love to do crafts based on books.

One of our recent picks was The Snowy Day by Ezra Jack Keats.

If you and your kids haven’t read this book yet, go find a copy. They will love hearing all about Peter and the things he did on that snowy day.

Disclosure: There are Amazon Affiliate and other affiliate links in this article which means, at no additional cost to you, we could receive compensation for our recommendations. You can read our full disclosure policy on our Disclosure Page for more details.

We decided to make our own snowy day scenes with Peter.

I provided blue construction paper for the background and large orange and green rectangles to use for the city buildings.

I also traced the picture of Peter on the book cover and cut him out of red construction paper.

The girls used their glue sticks and set up their city scene.

When it was time to add the snow, I gave the girls white paint and cotton swabs.

They could dab the paint to look like snow falling or easily smear it. AJ did a lot of dabbing!

At 2 1/2, she absolutely loves to paint like this. A lot of times she will choose a cotton swab over a paint brush!

Lizzie did a little bit more smearing and added snow to the tops of all the buildings and lots of snow falling from the sky.

You can see her finished picture in the top photo. AJ’s picture is below. Her snowy scene turned into a blizzard by the time she was done!

Have you read The Snowy Day? Are there any more snow books that you and your kids love?

  • « Go to Previous Page
  • Page 1
  • Interim pages omitted …
  • Page 23
  • Page 24
  • Page 25
  • Page 26
  • Page 27
  • Interim pages omitted …
  • Page 31
  • Go to Next Page »

Primary Sidebar

Footer

Categories

Archives

Copyright © 2026 ยท Designed by The Blog Surgery

Creative Family Fun uses cookies to improve your experience. These cookies provide feedback to our analytics and advertisers. We use the information to track views of the site, where you go and to know if you are a regular visitor or brand new as well as provide a personalized experience where possible. We'll assume you're ok with this, but you can opt-out if you wish.Accept Reject Read More
Privacy & Cookies Policy

Privacy Overview

This website uses cookies to improve your experience while you navigate through the website. Out of these, the cookies that are categorized as necessary are stored on your browser as they are essential for the working of basic functionalities of the website. We also use third-party cookies that help us analyze and understand how you use this website. These cookies will be stored in your browser only with your consent. You also have the option to opt-out of these cookies. But opting out of some of these cookies may affect your browsing experience.
Necessary
Always Enabled
Necessary cookies are absolutely essential for the website to function properly. This category only includes cookies that ensures basic functionalities and security features of the website. These cookies do not store any personal information.
Non-necessary
Any cookies that may not be particularly necessary for the website to function and is used specifically to collect user personal data via analytics, ads, other embedded contents are termed as non-necessary cookies. It is mandatory to procure user consent prior to running these cookies on your website.
SAVE & ACCEPT