• Skip to secondary menu
  • Skip to main content
  • Skip to primary sidebar
  • Skip to footer
  • Home
  • About
    • Email Me
    • Disclosure & Copyright
  • Start Here
  • Subscribe
  • Privacy Policy
  • Books for Moms

Creative Family Fun

Your one-stop shop for kids activities and family fun

  • Facebook
  • Instagram
  • Pinterest
  • Twitter
  • Spelling Activities
  • Family Fun
  • STEM
  • Movie Night
  • Toddler Activities

Terri Thompson

Around the World in 12 Dishes: Sweden

April 2, 2012 By Terri Thompson

When we moved on to Sweden, I had difficulty coming up with a recipe.We checked out a Scandinavian cookbook from the library, and I still wasn’t sure what we should cook.

Disclosure: There are Amazon Affiliate and other affiliate links in this article which means, at no additional cost to you, we could receive compensation for our recommendations. You can read our full disclosure policy on our Disclosure Page for more details.

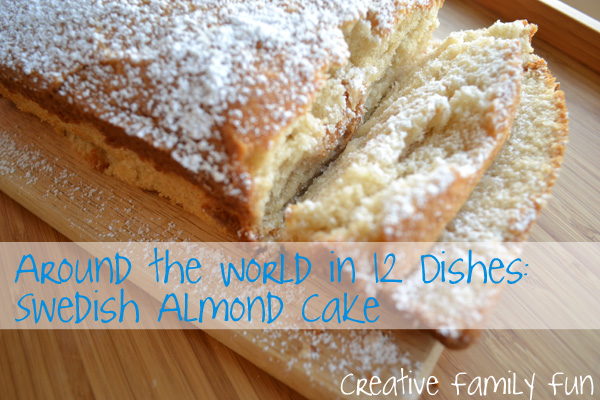
Finally I stumbled across a recipe for Swedish Almond Cake. I knew we had a winner!

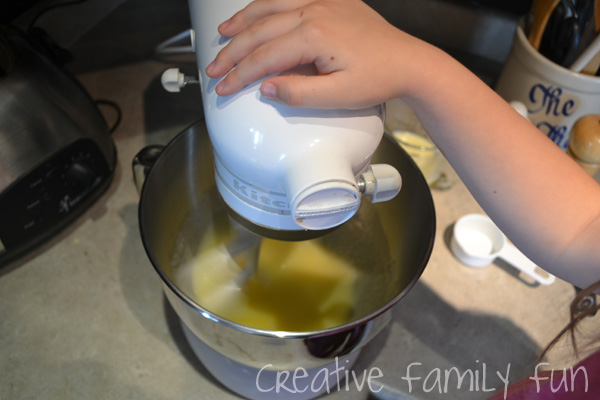
We got out the mixer and started baking.

We measured, mixed, and took turns supervising the mixer.

The recipe was easy to follow and produced a moist, yummy, and very, very sweet cake. I can’t reprint the recipe here for you, but you can find it here. I did not deviate from the recipe at all.

While waiting for the cake to bake, we learned about Sweden.

We located it on our globe and read a wonderful book, D is for D is for Dala Horse: A Nordic Countries Alphabet (Discover the World).

We leaned about all the Nordic countries. We learned about their customs, holidays, history, food, and of course, the Vikings.

The cake did not disappoint. It was moist and very yummy. And in the end, the girls were able to link the flavor with the interesting facts that we learned.

I highly recommend using food when learning about different cultures of the world!

Do you want to join the fun?
 
Cook a dish from Sweden
Make a craft from Sweden
Print your passport: Click here to download. Here is a little cover for it.
Color a placemat: Once colored/painted, you can laminate it or put it between clear contact paper to use it over and over. Click here to download.
Share with us: Our Sweden challenge starts on April 1st and will remain open for a year, so attach a link to your blog to enter the linky party or go to the comment section and post a photo together with what you did together with your child(ren).
Pinterest: We will add your photos to a “Around the World in 12 Dishes” Pinterest Boards (one for the dishes, one for the crafts) you will be a great source of inspiration for everyone 🙂


Kid’s Co-op

March 30, 2012 By Terri Thompson

It’s Friday and you know what that means? It’s time for the Kids Co-op! Link-up your favorite kid-related post and make sure and check out all the fun that has been linked up from other bloggers!
Since Easter is coming up soon, I thought I would share three of my favorite posts from the 175 posts that were linked up last week. (Yep, you heard that right 175 awesome ideas!)
B.Inspired Mama got the kids in the kitchen and made these adorable Easter Bunny Pretzel Treats. Yum!
Happy Hooligans made the cutest Easter chicks and nests from empty cardboard tubes.
Creative Connections for Kids has some great ideas for activities that use all those plastic eggs.

Now it’s your turn to share! Please join up and share your favorite post. (And, we’d love you forever if you’d link back to us!) Your link will show up on all of the hosts blogs. It’s time to link up, visit some new blogs, and have a lot of fun!

10 Ways to Keep Kids Occupied While You Cook Dinner

March 29, 2012 By Terri Thompson

I know I’m not the only one who’s struggled with trying to keep the kids busy so they’re not underfoot while I’m making dinner. I’ll admit that I’ve turned the TV on more times than I would like just so I wouldn’t have to worry about splattering oil or sharp knives. (Why yes, I am terrified of dropping a knife on their head… probably won’t happen, but it can stress me out nonetheless!)

So, for your benefit (and mine too), I’ve gathered 10 activities that are easy, self-directed and require little supervision (if any). Hopefully, you’ll find something to make dinner prep a little less stressful!

Disclosure: There are Amazon Affiliate and other affiliate links in this article which means, at no additional cost to you, we could receive compensation for our recommendations. You can read our full disclosure policy on our Disclosure Page for more details.

1. Use foam shapes to make designs on a window. All it takes is a little bit of water and the foam will stick! This activity is relatively mess free and you can let the kids to work at a window near the kitchen. You can read about our experience with window art here.

2. Listen to audio books. My girls love books and have not yet learned to read. So, I’ll pop in an audio book while I’m cooking and let someone else read to them. The next time you’re at the library, check out their collection of audio books. We’ve listened to everything from the Magic Tree House books to The Cat in the Hat and Other Dr. Seuss Favorites. It’s fun and a great way to wind down before dinner.

3. Let them play with quiet books. There are so many amazing quiet book ideas. If you’re crafty, make one yourself. This one from Serving Pink Lemonade is wonderful and there are tons of ideas on the blog How to Make a Quiet Book. If you’re not crafty, Etsy has many, many pre-made ones you could buy.

4. Play Follow the Leader. It’s an easy game to play, the kids won’t need your help, and they’ll have tons of fun. Perfect, right! Here are some fun versions of the game we came up with.

5. Play with play dough. Bring it to the kitchen table and let the kids play while you cook dinner. Add a rolling pin and some cookie cutters and your kids will be occupied nicely the entire time you’re cooking!

6. Make sticker scenes. Give your kids some stickers and papers and you’ll have a mess-free craft project for them to do while you cook. Plus, they’ll get the added benefit of working on those fine-motor skills. To make it even more fun, Let’s Explore uses landscape photos for making cool sticker scenes.

7. Play a matching game. Matching games are simple to set up and easy for the kids to work on by themselves. Our butterfly matching game using paint chips was easy to make. The Adventures of Bear has some fun letter matching games that are easy to make as well. Have a selection of matching games and you’ll always have something for the kids to do while you’re making dinner.

8. Put paint in a resealable bag for mess-free art. It’s mess free and fun. Mama Smiles shows you how to do it in this post.

9. Give them a dust rag. Yes, I’m serious. Have the kids clean while you cook. My girls love it when I hand them a dust rag. They’ll run through the house dusting everything they find (even the cat). Wordplayhouse has a wonderful post about involving your kids in cleaning.

10. Get out the Legos. Despite their young ages (2 & 4), my girls will play for a long time with our Duplos. Give the kids some free play time with their Legos and you’ll have some peace and quiet to make dinner. Or, you can challenge them with this fun Lego Challenge game from Quirky Momma Kids Activities Blog.

*Bonus activity: Let the kids help! Instead of sending the kids away, get them involved. They can stir, pour ingredients, or even cut some vegetables or herbs (like scallions) with kitchen shears or a vegetable peeler. I know not every meal is a good one for kids to help with. But, when you can, involve them. Help them take ownership over the food you’re eating.

Do you have any good tips for keeping the kids occupied while you cook dinner?

Owl Masks

March 28, 2012 By Terri Thompson

While learning about birds, there was no way we could forget the owl. Plus, the girls love just about any excuse to run around the house “hoo-hooing” at the top of their lungs.

To encourage a bit of owl play, we got out our supply of paper plates and made a couple of owl masks.

Disclosure: There are Amazon Affiliate and other affiliate links in this article which means, at no additional cost to you, we could receive compensation for our recommendations. You can read our full disclosure policy on our Disclosure Page for more details.

I cut the initial shape and the eye holes.

We opted for the horned owl look, but you could certainly leave the paper plate round as many owls have rounded faces.

We looked at several owl pictures for inspiration and picked out a few paint colors that were best suited to the owl.

After cutting out the shapes, I stepped back and let the girls work on their own.

The girls looked at pictures and got lost in the painting for awhile.

Lizzie had found a picture of a great-horned owl and was attempting to replicate the look on her mask. I love the white circles she made around the eye holes!

AJ added a bit of yellow to her owl. She loves yellow and wants to add that color to just about everything she does! She had a lot of fun just experimenting with her paint.

When the paint was dry, we drew on beaks, punched holes in the side, and added string to tie around the girls head. Then they ran around the house “hoo-hooing” at the top of their lungs!

What animal does your kid like to pretend to be?

Daily Buzz Moms 9×9 Spring Fever!

March 27, 2012 By Terri Thompson

I’m thrilled to be writing this post as part of the Daily Buzz Moms 9×9: Spring Fever.

When I think of spring I think of flowers, birds, warm breezes and new warmth.

Lizzie and I set out to capture that feeling by creating our own indoor garden. Not only did we want to create a beautiful garden, we also planned on making it all from items that were in our recycle bin.

Disclosure: There are Amazon Affiliate and other affiliate links in this article which means, at no additional cost to you, we could receive compensation for our recommendations. You can read our full disclosure policy on our Disclosure Page for more details.

To create the base, we found a small cardboard box and cut off all the side flaps. We wanted a clean and sturdy base.

Then we raided our supply of cardboard tubes and arranged them until they fit inside. This was for our grassy area. We planned on sticking our flowers in between two tubes.

Since empty cardboard tubes are quite squishable, it’s easy to fit them inside most cardboard boxes.

After we had an arrangement we liked, we glued them into the box. Make sure you only put glue on the bottom because you will need to slide things in between the tubes.

By this time, AJ wanted to join in on the fun, so I gave her the green paint and she started painting the grass.

Meanwhile, Lizzie and I set to work on the flowers. We took an empty egg carton and separated it into single cups. I trimmed off the ragged edges and Lizzie picked out painted colors. We planned on turning these into tulips, our favorite spring flower.

Lizzie was in charge of the colors, so she chose red and purple. She opted to do one color on the inside and the other color on the outside of our egg cups. We wanted to paint both the inside and the outside so that our garden would be colorful no matter what angle you were looking.

While the paint was drying, we worked on the hummingbird for our garden. This was Lizzie’s idea. She thought a hummingbird would be a great addition to our garden and she was right. We looked through our pile of bird books from the library and found a simple picture of a hummingbird. I drew the hummingbird on a scrap piece of cardboard and Lizzie colored it with her markers.

Once the paint was dry, we attached out tulips to our craft sticks. We already had a package of colored craft sticks in our art supplies, so we opted to used those instead of something from the recycle bin.

If you don’t have colored craft sticks, you could paint plain craft sticks, use strips of stiff cardboard, or anything else you can find to provide a stiff base for your flowers (and hummingbird). I cut a slit in the bottom of the egg cups, so we could slide the craft sticks in. We glued the craft stick on the back of the hummingbird.

Now it was time to arrange our garden. After we were satisfied with our arrangement, we put glue at the bottom of each craft stick for stability, stepped back, then let it dry.

I loved our collaboration and I love the way our project turned out! We now have a beautiful spring centerpiece for our table… at least when it isn’t being played with!

  • « Go to Previous Page
  • Page 1
  • Interim pages omitted …
  • Page 158
  • Page 159
  • Page 160
  • Page 161
  • Page 162
  • Interim pages omitted …
  • Page 190
  • Go to Next Page »

Primary Sidebar

Footer

Categories

Archives

Copyright © 2026 · Designed by The Blog Surgery

Creative Family Fun uses cookies to improve your experience. These cookies provide feedback to our analytics and advertisers. We use the information to track views of the site, where you go and to know if you are a regular visitor or brand new as well as provide a personalized experience where possible. We'll assume you're ok with this, but you can opt-out if you wish.Accept Reject Read More
Privacy & Cookies Policy

Privacy Overview

This website uses cookies to improve your experience while you navigate through the website. Out of these, the cookies that are categorized as necessary are stored on your browser as they are essential for the working of basic functionalities of the website. We also use third-party cookies that help us analyze and understand how you use this website. These cookies will be stored in your browser only with your consent. You also have the option to opt-out of these cookies. But opting out of some of these cookies may affect your browsing experience.
Necessary
Always Enabled
Necessary cookies are absolutely essential for the website to function properly. This category only includes cookies that ensures basic functionalities and security features of the website. These cookies do not store any personal information.
Non-necessary
Any cookies that may not be particularly necessary for the website to function and is used specifically to collect user personal data via analytics, ads, other embedded contents are termed as non-necessary cookies. It is mandatory to procure user consent prior to running these cookies on your website.
SAVE & ACCEPT