• Skip to secondary menu
  • Skip to main content
  • Skip to primary sidebar
  • Skip to footer
  • Home
  • About
    • Email Me
    • Disclosure & Copyright
  • Start Here
  • Subscribe
  • Privacy Policy
  • Books for Moms

Creative Family Fun

Your one-stop shop for kids activities and family fun

  • Facebook
  • Instagram
  • Pinterest
  • Twitter
  • Spelling Activities
  • Family Fun
  • STEM
  • Movie Night
  • Toddler Activities

Terri Thompson

10 Ways to Play This Weekend: Week 55

December 6, 2013 By Terri Thompson

Are you overwhelmed with Christmas planning yet?

I know I am. That’s why the weekend is the perfect time to set aside some time and have a little fun together as a family.

Here are 10 ideas that I’ve rounded up that are all perfect form some weekend fun.

  1. Make some Christmas contact paper art with Fun-A-Day
  2. Have a sight word snow ball fight with Coffee Cups and Crayons
  3. Make button snowflakes for your Christmas Tree with Red Ted Art
  4. Write stories to Christmas music with This Reading Mama
  5. Make pretty laminated Christmas baubles with Childhood 101
  6. Play parking lot addition with What Do We Do All Day?
  7. Make cookies for the birds with Creative With Kids
  8. Do some Christmas ribbon measuring with Inspiration Laboratories
  9. Make some fun Christmas shakers for baby from Dirt & Boogers
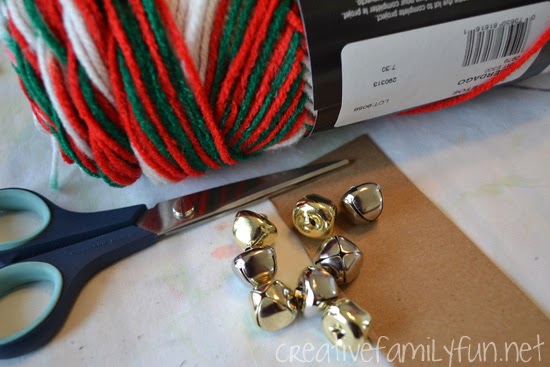
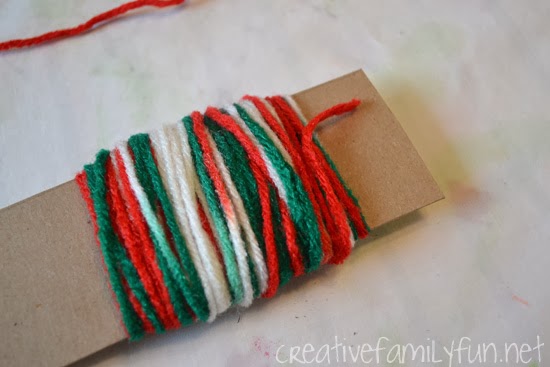
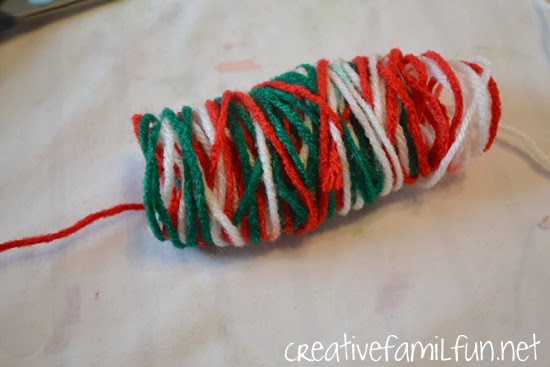
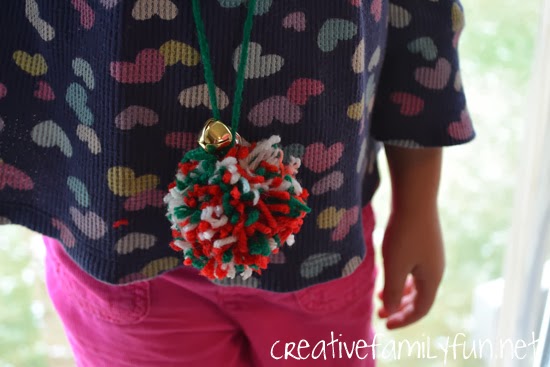
  10. Make Santa hat ornaments with Creative Family Fun
How are you going to play this weekend?

Joy To the World Christmas Ornaments

December 5, 2013 By Terri Thompson

*Disclosure: CraftProjectIdeas.com provided me with some of the supplies for this project.

I always have Christmas music playing in December.

Always.

Which is why I decided to use Christmas carols as a loose theme for our craft projects this holiday season.

One of my favorite carols is Joy To the World, especially when it’s sung by a full choir.  (Here’s a lovely version if you want to take a listen.)

We took a little DIY Mod Podge (decoupage medium), a world map, and some cardboard to make these fun and sparkly reminders of the song.

Disclosure: There are Amazon Affiliate and other affiliate links in this article which means, at no additional cost to you, we could receive compensation for our recommendations. You can read our full disclosure policy on our Disclosure Page for more details.

Supplies Needed:

Homemade glitter Mod Podge (see below for instructions)
Paint brushes
Thin cardboard (cereal or cracker boxes work best)
World map (recycle one you own or print a new one)
Glitter
Permanent markers
String for hanging

DIY Mod Podge:
Glue
Water
Iridescent glitter

You’ll want to begin with a map.

We used colored pencils to color in an old outline map I had. You can use any map you might have, a state or city map would also world for this project.

If you don’t have a map you can cut up, National Geographic Education has an online map maker that you can use to create and print a world map.

Cut a rectangle from both your cardboard and your map of equal sizes.

DIY Glitter Mod Podge (decoupage medium): To make your decoupage medium, you will need one part glue to one part water. I mixed the two up in a small container with a tight fitting lid. Add the two ingredients together and shake until they combine. Then, add a generous amount of glitter to the mixture and shake again. I used the iridescent glitter from CraftProjectIdeas.com. Add a lot of glitter to your mixture. Once it’s in the glue, it won’t scatter about your house!

Brush a coating of your decoupage medium on your cardboard and press the map down on top.

Add another layer of the decoupage medium to the top of your map. Just add a thin coating, otherwise you’ll be waiting all day for the map to dry.

We added an extra shake of glitter on top of our glue, since we didn’t think our maps were quite glittery enough.

While the maps were drying (we waited about an hour), I made a simple template for our ornaments.

I used some of the scrap cardboard and wrote the word joy in big letters. I then cut around the letters.

If you’re not feeling artsy enough to make the word art, make a simple oval template.

Once your maps have dried, trace the outline of your template onto the back of your cardboard.

Cut around your outline.

Using your marker, trace the letters onto the front of your map. If you made an oval template, simply write the word “joy” in big letters on your map.

Punch holes in both sides of your ornament and add your string.

Your glittery Joy to the World ornaments is ready to hang on your tree!

What is your favorite Christmas carol?

Pom Pom and Jingle Bell Necklaces

December 3, 2013 By Terri Thompson

Everyone needs a festive necklace to wear for Christmas, right? I thought so.

That’s why we spent an afternoon making a few DIY pom pom and jingle bell necklaces.

Pom pom making is fun and it’s easy to do, even without a special pom pom maker. We don’t have one and were able to make these necklaces quite easily.

Disclosure: There are Amazon Affiliate and other affiliate links in this article which means, at no additional cost to you, we could receive compensation for our recommendations. You can read our full disclosure policy on our Disclosure Page for more details.

Supplies Needed:

Thin cardboard (cereal or cracker box)
Yarn
Sharp scissors
Jingle bells

Before you begin, cut a couple of strips from the cardboard. Ours were about width of three fingers, and I thought it made a nice sized pom pom.

Next, wrap the yarn around the strips. Don’t wrap too tight! We wrapped the yarn around approximately 100 times. (Extra counting practice – yahoo!)

We found that 100 times made a perfect pom pom.

Carefully slide your cardboard out of your yarn bundle. If you wrap too tight, you won’t be able to get it out.

I found that the thin cardboard worked best because we were able to bend it a bit to slide it out more easily. Lay your yarn bundle on top of another length of string.

Bring up the yarn on either side of your bundle and tie it in a tight knot. Your bundle will form this nice little ball while you’re tying.

A grown-up may want to do this part because you will need to tie this tightly. We left one of ours too loose and our pom pom eventually scattered bits of yarn all over the floor. The ones we’ve tied tightly have held together nicely.

After you’ve tied your knot, slip another length of yarn underneath the knot. This will be the necklace.

Slip your scissors through the loops and start cutting. Use sharp scissors because kid safety scissors won’t cut the yarn well. Both of my girls did their own cutting and were well supervised at the time.

After all your loops are cut, trim your ends so that your pom pom resembles a ball instead of an unruly bundle of yarn.

Be careful that you don’t trim your long pieces of the necklace. You’ll need those to tie around your neck.

Once your pom poms are trimmed to your satisfaction, string two jingle bells on each necklace. We did find this step to be a bit difficult since our jingle bells had small openings at the top. We ended up wrapping tape around one end of the yarn and using it as a makeshift needle.

Once the jingle bells are on, tie the ends of the yarn together to make your necklace.

Now, you’ve got the perfect necklace for a bit of caroling.

Jingle bell, jingle bells
Jingle all the way.
Oh what fun, it is to ride
In a one-horse open sleigh. Hey!

Have fun making your own DIY pom pom and jingle bell necklaces for Christmas.

10 Ways to Play This Weekend: Week 54

November 22, 2013 By Terri Thompson

It’s the weekend before Thanksgiving and we’re going to spend some time relaxing and trying not to get too cold. The weather’s going to be quite frigid… brrrrrrr!

Rumor has it, we may put up our Christmas tree early. Shhhh! Don’t tell anyone!

Here are 10 fun ideas for family time this weekend.

I’ve got a few Christmas ideas thrown in because I’m ready to start Christmas crafting. But, don’t worry, it’s not all holiday related. I’m sure you’ll find something fun to do in the list.

  1. Start up a Secret Stories Society with Little Wonders’ Days
  2. Make beautiful salt dough sun catchers with Homegrown Friends
  3. Use your Legos to make flags from around the world with Csupamoka2
  4. Play with cranberry dough with Learn Play Imagine (This is super-fun to play with!)
  5. Make easy scratch-art Christmas ornaments with Creative Family Fun 
  6. Play sight word bingo with Playful Learning
  7. Bake up a batch of easy fall bread with Fantastic Fun and Learning
  8. Make fun sponge painted turkey hats with Stay at Home Educator
  9. Make puzzle snowflakes for your Christmas tree with Red Ted Art
  10. Make a Christmas bulbs sun catcher with Here Comes the Girls
How are you going to play this weekend?


Thankful Jar

November 21, 2013 By Terri Thompson

I love activities this time of year that get kids talking about gratitude.

Recently, we made this thankful jar and the kids have been filling it with all the things that make them thankful.

Disclosure: There are Amazon Affiliate and other affiliate links in this article which means, at no additional cost to you, we could receive compensation for our recommendations. You can read our full disclosure policy on our Disclosure Page for more details.

Supplies Needed:

Glass jar
Brown paper bag
Mod Podge
Paint brush

*Note: I originally considered using the twine to tie around the top of the jar, but decided I liked the plain jar better. The twine is a good option if you want to add a bit of something extra to your jar.

Cut a selection of hearts from your brown paper bag.

You won’t need very many to decorate your jar. We only used five. Don’t worry about creases in the paper either, they will smooth out once you begin Mod Podging.

Cover your jar with a coat of Mod Podge.

If you’re looking for a nice, neat finish, try to keep your brush strokes going in the same direction and cover your jar with a nice even coat. I was crafting with a 4-year-old and decided it didn’t really matter. Our jar was just as beautiful this way and you really couldn’t tell that we had an uneven coat.

Once you have your coat of Mod Podge on the jar, add your hearts, smoothing out any bumps, bubbles, and wrinkles.

Once you’re satisfied with the layout of your hearts, paint another coating of Mod Podge over the top of everything. The Mod Podge will dry clear.

It takes about 30 minutes for the Mod Podge to dry enough for handling.

While our jar was drying, I cut a piece of paper into strips.

We started writing down the things we were thankful for, such as God, birds, grandparents, and good books.

We added our strips to the jar once it was dry.

I also left a pile of blank strips and a pen next to our jar with the invitation to add strips to the jar at any time.

This really was an easy craft to do and quite appropriate for older kids to do themselves. I worked side-by-side with my 4-year-old, but an older child would be able to make the jar independently.

My favorite part of the project was watching my 6-year-old sneak over to the jar later that evening, write down a few carefully thought out things, drop them in the jar, and run off to play. That’s enough to make your heart smile!

Do you have any fun ideas for teaching gratitude to kids?

  • « Go to Previous Page
  • Page 1
  • Interim pages omitted …
  • Page 107
  • Page 108
  • Page 109
  • Page 110
  • Page 111
  • Interim pages omitted …
  • Page 190
  • Go to Next Page »

Primary Sidebar

Footer

Categories

Archives

Copyright © 2026 · Designed by The Blog Surgery

Creative Family Fun uses cookies to improve your experience. These cookies provide feedback to our analytics and advertisers. We use the information to track views of the site, where you go and to know if you are a regular visitor or brand new as well as provide a personalized experience where possible. We'll assume you're ok with this, but you can opt-out if you wish.Accept Reject Read More
Privacy & Cookies Policy

Privacy Overview

This website uses cookies to improve your experience while you navigate through the website. Out of these, the cookies that are categorized as necessary are stored on your browser as they are essential for the working of basic functionalities of the website. We also use third-party cookies that help us analyze and understand how you use this website. These cookies will be stored in your browser only with your consent. You also have the option to opt-out of these cookies. But opting out of some of these cookies may affect your browsing experience.
Necessary
Always Enabled
Necessary cookies are absolutely essential for the website to function properly. This category only includes cookies that ensures basic functionalities and security features of the website. These cookies do not store any personal information.
Non-necessary
Any cookies that may not be particularly necessary for the website to function and is used specifically to collect user personal data via analytics, ads, other embedded contents are termed as non-necessary cookies. It is mandatory to procure user consent prior to running these cookies on your website.
SAVE & ACCEPT