Do you make an advent calendar? It’s a fun way to fit in a little bit of extra fun and family time over the holiday season. I’ve seen calendars filled with candy or little toys. We have one that tells the Christmas story over the course of 24 tiny books. Other advent calendars are filled with fun little activities. If that’s the kind of advent calendar you’re looking for, then you’re in luck. Here are 24 activities to add to your calendar. Click the links provided for more details.
Disclosure: There are Amazon Affiliate and other affiliate links in this article which means, at no additional cost to you, we could receive compensation for our recommendations. You can read our full disclosure policy on our Disclosure Page for more details.
Day 1: Decorate your Christmas tree
Day 3: Read a new Christmas book. Here are some greats ideas at this book list from Modern Parents Messy Kids.
Day 5: Put on the Christmas tunes and have a dance party!
Day 7: Play in the snow! If you don’t have any, you can make some snow dough like this from Buggy and Buddy.
Day 8: Make gifts for neighbors, co-workers, and friends. Try these hot chocolate spoons from The Nerd’s Wife or this gift of dishes from Capturing Joy with Kristen Duke.
Day 10: Use footprints to decorate your own wrapping paper. Check out this fun idea at Skip to My Lou.
Day 11: Make hot chocolate and watch a favorite Christmas movie.

Day 13: Play some Christmas word games. I’ve got some fun choices for you here.
Day 14: Create a time capsule Christmas ornament. Find the instructions at Barefeet on the Dashboard.
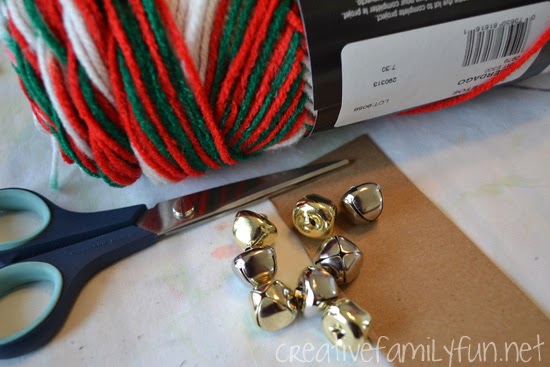
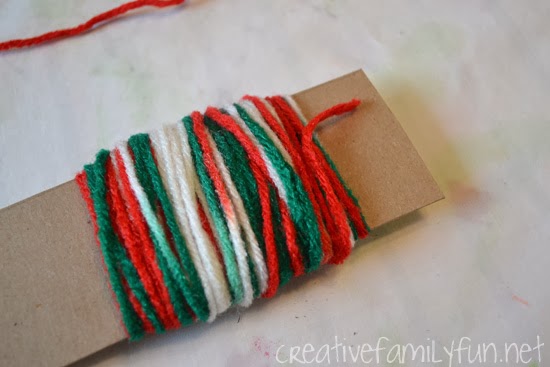
Day 15: Make pom-pom jingle bell necklaces.
Day 16: Build a snowman – on your window. Check out this fun idea from The Train Driver’s Wife.
Day 18: Have a Christmas carol sing-along.
Day 20: Drive around town and look at all the beautiful Christmas lights.
Day 22: Make Joy to the World ornaments.
Day 23: Snack on hot chocolate popcorn from Chocolate Moosey. Oh, and watch another favorite Christmas movie!
Day 24: Read the Christmas story from the Bible.
What ideas would you add to an advent calendar?