I’ve partnered with Parragon Books to start bringing you fun book reviews each month. They have a ton of fun books – including a favorite type in our house, activity books.
Why are activity books such a favorite? Because, they rock!
Disclosure: I received a free copy of the book from Parragon Books; all opinions are my own. All links are Amazon Affiliate links. Please see my disclosure for more details.

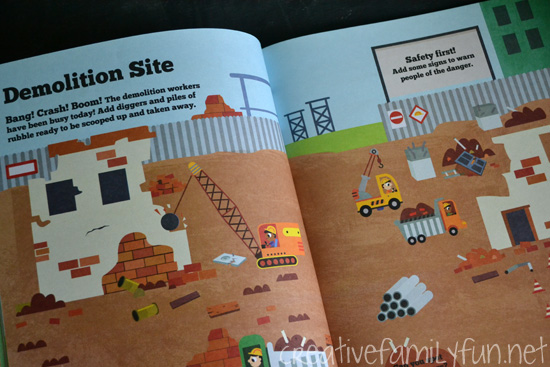
We received Busy Busy Things That Go with 2000 Stickers and my kindergartner claimed it as soon as she saw it. It rocked her world. It’s rated ages 3 and up and it’s absolutely perfect for that age group. There were a few mazes and matching activities, but most of the pages ask the child to complete a picture using the stickers. My daughter added piles of rubble and safety signs to a demolition site. She also added missing parts to construction vehicles. The pages are fun and colorful. Plus, they are great prompts to storytelling. All in all, it fit our criteria for a rockin’ activity book.
We always keep a pile of activity books on hand. Why?
They’re portable. Take one along to a restaurant or a waiting room. Activity books are mess free, quiet, and have plenty of things to keep your child from getting bored.
They’re perfect for the car. Take one (or two, or three) along on road trips, for all the reasons listed above.
They keep the mind working in many ways. Whether your child is solving a maze, spotting differences, making matches, or storytelling, they’re using their brains. Not only that, but they’re using their brains while having fun.
It’s an independent activity. Kids can work on activity books independently. Pre-readers may need a someone to read the instructions, but for the most part they can work on it alone. As long as you make sure you buy activity books at the correct level for your child, they’ll love the opportunity to work on something on their own.
They’re fun. This right here is the #1 reason why we love activity books. They’re fun and my kids enjoy them.

Do your kids love activity books?
Thank you Parragon Books for the opportunity to review. You can find more of their activity book titles here. You can also follow them on Facebook, Twitter, and Pinterest for more fun.