• Skip to secondary menu
  • Skip to main content
  • Skip to primary sidebar
  • Skip to footer
  • Home
  • About
    • Email Me
    • Disclosure & Copyright
  • Start Here
  • Subscribe
  • Privacy Policy
  • Books for Moms

Creative Family Fun

Your one-stop shop for kids activities and family fun

  • Facebook
  • Instagram
  • Pinterest
  • Twitter
  • Spelling Activities
  • Family Fun
  • STEM
  • Movie Night
  • Toddler Activities

Terri Thompson

Simple Peacock Feathers…

October 12, 2011 By Terri Thompson

Disclosure: There are Amazon Affiliate and other affiliate links in this article which means, at no additional cost to you, we could receive compensation for our recommendations. You can read our full disclosure policy on our Disclosure Page for more details.

We finished up our exploration of India by learning about their national bird, the peacock.We began by reading the book Meet the Peacock by Suzanne Buckingham. We learned all sorts of fun facts about the peacock. One of our favorite facts was learning that only the male bird is called the peacock, the females are peahens.

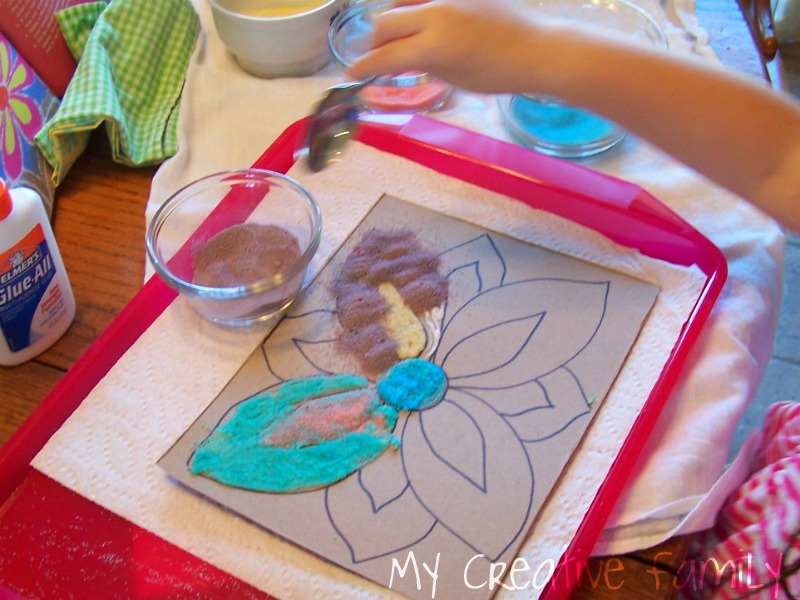
After reading the book, we did a simple craft – making peacock feathers.

I had already prepped the craft by cutting out the various bits and pieces we would glue together.My plan was to demonstrate how the feathers went together and then let Lizzie work on the project independently.

After she sorted and arranged all the parts (her idea), she was ready to go. Armed with a glue stick, she got to work.

The project was simple, but pretty.It was also a good way for Lizzie to work on following directions. She did a great job and we had a lot of fun discussing the peacock while we worked.

This is one reason why I love to pair a book with a project. Working on the project often leads to conversation about the book, reinforcing what you read in a natural manner.

In the end, we had a couple of vibrant feathers, a little learning and a lot of fun!

Owl Craft Roundup…

October 11, 2011 By Terri Thompson

One of the items on our Fall Bucket List is to make an owl craft. I went searching for some fun ideas and came away with so many good ones that I can’t keep them to myself.

Disclosure: There are Amazon Affiliate and other affiliate links in this article which means, at no additional cost to you, we could receive compensation for our recommendations. You can read our full disclosure policy on our Disclosure Page for more details.

Meet the Dubiens made adorable hand print owls

These cardboard roll and pumpkin seed owls from Red Ted Art are a lot of fun

I found some more cute cardboard roll owls at Happy Hooligans

The paper plate owls from Crafts by Amanda would be fun too!

I love the Owl Babies craft from I Heart Crafty Things and it’s a great reminder of a favorite book

If you’re looking for more owl craft ideas, I’ve started a Pinterest board full of owls.

With so much inspiration, how will we ever choose which craft to do? So, what do you think, which one should we do?

Loving Literature – A New Halloween Favorite…

October 10, 2011 By Terri Thompson

Disclosure: There are Amazon Affiliate and other affiliate links in this article which means, at no additional cost to you, we could receive compensation for our recommendations. You can read our full disclosure policy on our Disclosure Page for more details.

We found a new favorite Halloween book this year! The 13 Days of Halloween by Carol Greene is a fun and silly read that is perfect for celebrating the season. It’s a Halloween book written in the style of The Twelve Days of Christmas. Perfect for a read-aloud and sure to solicit many, many giggles.

The book follows this lovely, green lady and her gentleman friend as he attempts to give her a new gift for every day. He starts with a vulture in a dead tree and the gifts get sillier each day ending on the thirteenth day when the lady gives her gentleman friend a gift.

Grab the kids for a fun read-aloud, or even better, sing the book! Pretty soon the kids will be joining along… if they can stop giggling. I know we’ll be reading this book many more times before Halloween.

If you’re looking for other good Halloween reads, check these out:

The Fierce Yellow Pumpkin by Margaret Wise Brown

Which Witch’s Wand Works? by Poly Bernatene

Happy Halloween! (Max and Ruby)

Who’s There on Halloween? by Susan Hagan Nipp and Pamela Conn Beall

Googly-Eye Spider Masks…

October 6, 2011 By Terri Thompson

Watch out! The spider’s gonna get you!

Number 13 on our Fall Bucket List was to make spider masks.We’ve already began checking things off our list and recently decided that spider masks would be fun to do for craft time.

And what would make spider masks even more perfect? Why googly eyes, of course!

Disclosure: There are Amazon Affiliate and other affiliate links in this article which means, at no additional cost to you, we could receive compensation for our recommendations. You can read our full disclosure policy on our Disclosure Page for more details.

Supplies Needed

Paper plates (1 for each spider)
Black construction paper (enough for 8 legs per spider – I used one sheet per set of 8 legs)
Black paint
Large craft sticks
Googly eyes

To prep the craft, I cut the center out of the paper plate. I wanted to flat portion only. I cut the eye holes out as well. I also cut the strips of paper. (I did this part because my girls aren’t all that skilled with scissors yet!)

First, we painted the paper plate and craft stick black.I thinned the paint a bit with water, so it wouldn’t be so thick and goopy on the masks. (You can thin any water-soluble paint with water.)

Then came the hard part; we had to let it dry!

Next, we accordion folded all the paper strips so the legs would be nice and wiggly.This part was difficult for my 4- and 2-year-old, so I had to help a lot. (Yep, you guessed it. I ended up folding all the legs… oh well!)

Finally, it was time to glue!I poured some glue in a saucer and gave the girls cotton swabs to make it a bit easier for them to handle.

They glued the googly eyes all over the mask and then we glued the legs to the back of the paper plate.

As a final step, we glued the painted craft sticks to the bottom of the plates. These are the handles for the girls to hold up to their faces.

Don’t forget the very important step of holding the googly eyes over your actual eyes so Mom can take silly pictures!

Spider masks are a must for Halloween this year! Have you started making Halloween crafts this year?

Indian Art – Rangoli Designs

October 5, 2011 By Terri Thompson

We’re still talking about India and we recently learned a little about a traditional form of Indian art, Rangoli.These designs are typically done on floors, but we needed something a bit more small scale! I opted for recycling a cereal box instead.

Disclosure: There are Amazon Affiliate and other affiliate links in this article which means, at no additional cost to you, we could receive compensation for our recommendations. You can read our full disclosure policy on our Disclosure Page for more details.

This project took a little more prep work than usual on my part, but it was worth all the trouble.I started out my searching for Rangoli designs on-line and found a couple of easy designs to copy. I drew the designs on our recycled cardboard with a Sharpie.

Then, I dyed the salt. Each color took about 1/4 cup of salt and 3-4 drops of food coloring. If you want more vibrant colors, just add more food coloring.

When dying the salt, you need to start stirring immediately after adding the food coloring, otherwise, it will start getting clumpy. We let the salt dry overnight before using it.

I set up our crafting area with our designs, bowls of colored salt, spoons, glue and pictures from a book about India for inspiration.I sat the designs on individual trays to help us pour excess salt back into the bowls. I would suggest not doing this project in a carpeted area! My floor was quite gritty with salt when we were done. (I think I’ll be cleaning it up for days!)

To do the project, the girls applied glue to one area of the design and then spooned the colored salt over the area.

We then shook the excess off, then added more glue to another area. The girls greatly enjoyed the process.

Lizzie carefully considered each color and AJ’s favorite part was spooning the salt.

We tried applying the salt with our fingers and at one point we (AJ) decided to just pour entire bowls of salt on our designs.

We also took a few breaks in our artwork to play with the excess salt on our trays!

In the end, we had a colossal mess, but also some very pretty artwork. I’m hoping that by doing some of our cultural projects, the girls are soaking in information about this big world of ours. My wish is to spark an interest and make them eager to see and learn about all the corners of the world.

  • « Go to Previous Page
  • Page 1
  • Interim pages omitted …
  • Page 177
  • Page 178
  • Page 179
  • Page 180
  • Page 181
  • Interim pages omitted …
  • Page 190
  • Go to Next Page »

Primary Sidebar

Footer

Categories

Archives

Copyright © 2026 ยท Designed by The Blog Surgery

Creative Family Fun uses cookies to improve your experience. These cookies provide feedback to our analytics and advertisers. We use the information to track views of the site, where you go and to know if you are a regular visitor or brand new as well as provide a personalized experience where possible. We'll assume you're ok with this, but you can opt-out if you wish.Accept Reject Read More
Privacy & Cookies Policy

Privacy Overview

This website uses cookies to improve your experience while you navigate through the website. Out of these, the cookies that are categorized as necessary are stored on your browser as they are essential for the working of basic functionalities of the website. We also use third-party cookies that help us analyze and understand how you use this website. These cookies will be stored in your browser only with your consent. You also have the option to opt-out of these cookies. But opting out of some of these cookies may affect your browsing experience.
Necessary
Always Enabled
Necessary cookies are absolutely essential for the website to function properly. This category only includes cookies that ensures basic functionalities and security features of the website. These cookies do not store any personal information.
Non-necessary
Any cookies that may not be particularly necessary for the website to function and is used specifically to collect user personal data via analytics, ads, other embedded contents are termed as non-necessary cookies. It is mandatory to procure user consent prior to running these cookies on your website.
SAVE & ACCEPT